
Somfy Universal Receiver RTS (1810627) — Installation Instructions
Installation instructions for the Somfy Universal Receiver RTS (Part No. 1810627) — adds wireless RTS control to Somfy motors for awnings and shades.
Full text manual (for reference)
Installation instructions for the Somfy Universal Receiver RTS, Part No. 1810627 — adds RTS (Radio Technology Somfy) wireless control capability to Somfy standard motors.
Overview
- Functions stand-alone as a radio control, or paired with Somfy RTS sensors (Eolis Sensor RTS for wind, Soliris Sensor RTS for sun + wind) for automatic wind/sun protection on retractable awnings.
- Supports two user-programmable intermediate positions.
- Housed in a weatherproof enclosure with watertight strain-relief fittings for wire entry.
- Memory: up to 12 transmitters/channels and up to 3 sensors.
Installation
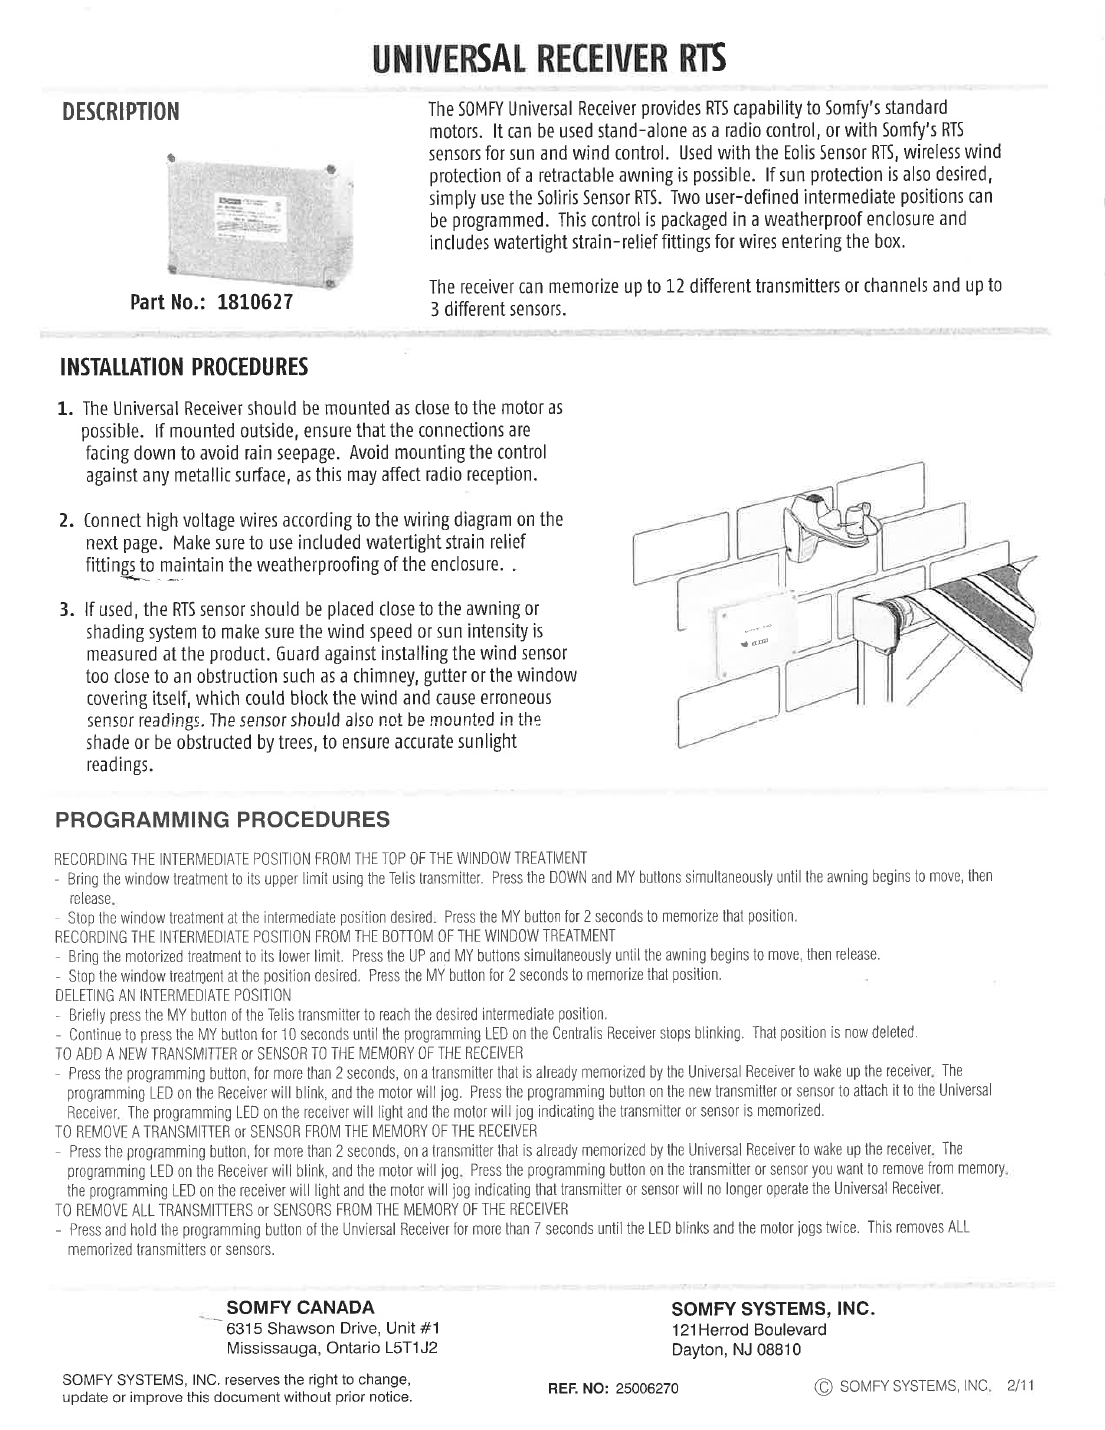
- Mount the receiver as close to the motor as possible. If mounted outdoors, orient connections facing downward to prevent water seepage. Avoid mounting against metallic surfaces (affects radio reception).
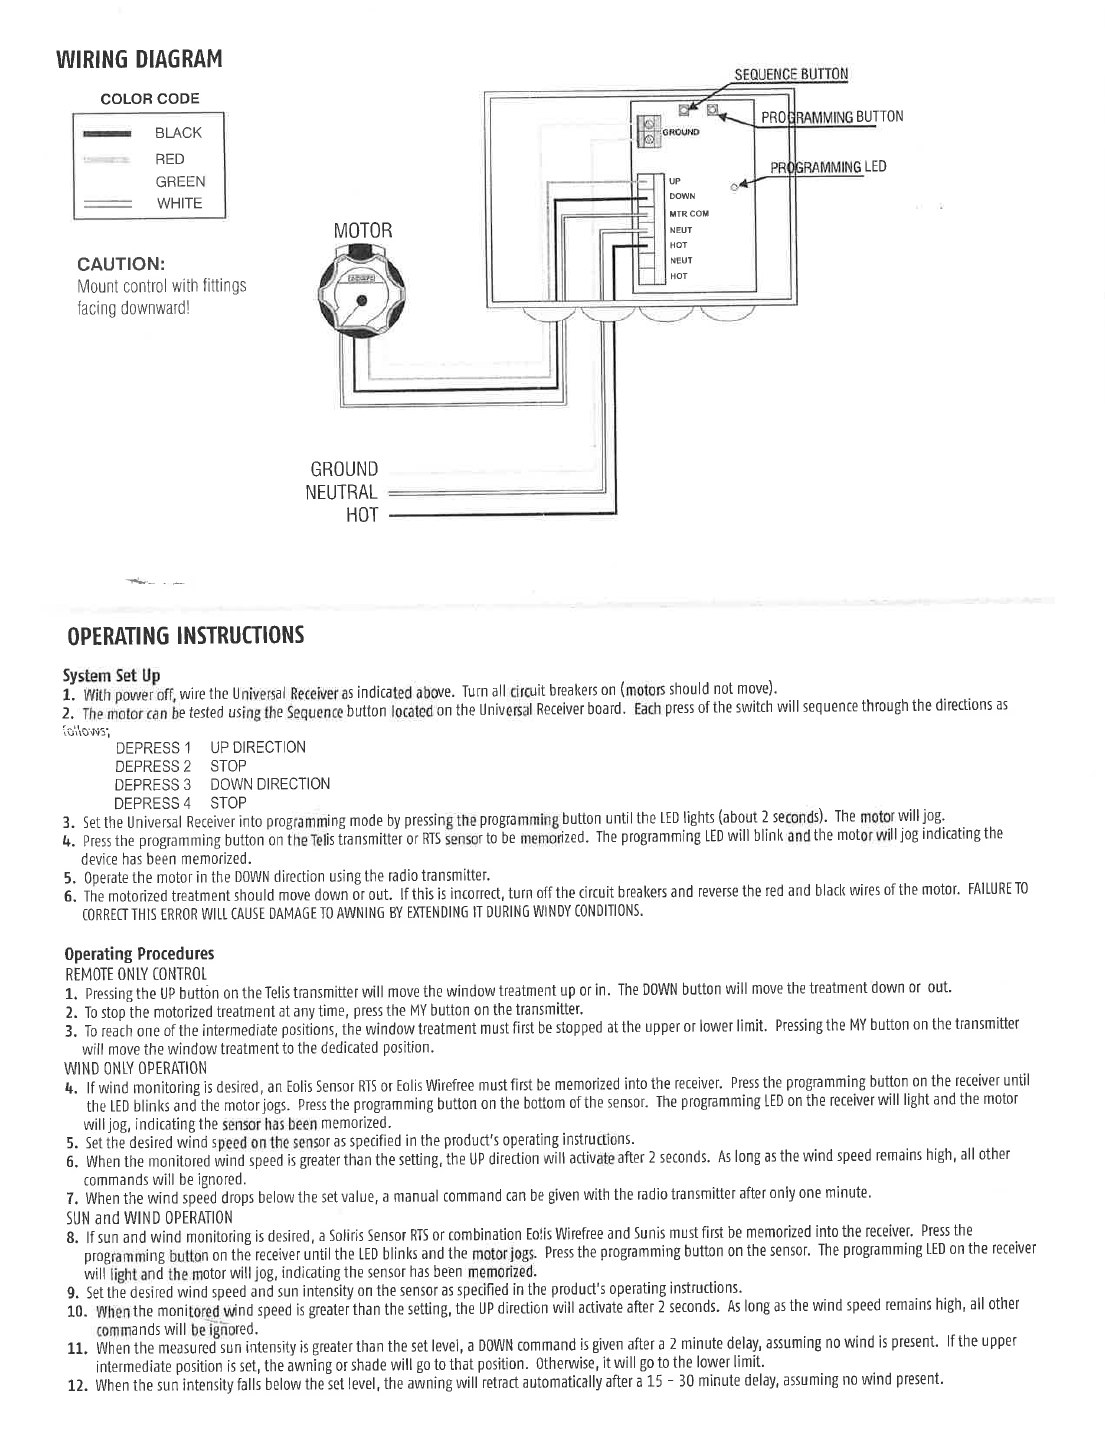
- Connect high-voltage wires per the wiring diagram (see below); use the included watertight strain-relief fittings to preserve weatherproofing.
- If used, mount the RTS sensor close to the awning/shading system — avoid obstructions (chimneys, gutters, window coverings) that could block wind readings, and avoid shaded areas or tree obstruction for accurate sun readings.
Caution: Mount the control with fittings facing downward.
Programming
- Recording an intermediate position from the top: move the shade to the upper limit via the Telis transmitter; press DOWN+MY simultaneously until movement starts, release; stop at the desired position; hold MY for 2 seconds to save.
- Recording an intermediate position from the bottom: same process using UP+MY from the lower limit.
- Deleting an intermediate position: press MY to reach the position, then hold MY for 10 seconds until the receiver's programming LED stops blinking.
- Adding a new transmitter/sensor: hold the programming button (2+ seconds) on an already-memorized transmitter to wake the receiver (LED blinks, motor jogs), then press the programming button on the new transmitter/sensor — LED lights, motor jogs to confirm memorization.
- Removing a transmitter/sensor: wake the receiver as above, then press the programming button on the device to be removed.
- Removing ALL transmitters/sensors: hold the receiver's programming button for more than 7 seconds until the LED blinks and the motor jogs twice — this erases all memory.
Wiring
The motor connects to the Universal Receiver board, which has labeled terminals for the Sequence Button, Programming Button, Programming LED, a Ground terminal, and wire terminals for UP, DOWN, MTR COM, NEUT, HOT, NEUT, HOT. Main power leads (Ground, Neutral, Hot) feed into the receiver box. Wire colors: Black, Red, Green, White per the wiring diagram.
System Setup
- With power off, wire the receiver per the diagram. Turn on circuit breakers (motor should not move yet).
- Test the motor using the Sequence button on the receiver board — cycles: Depress 1 = UP, Depress 2 = STOP, Depress 3 = DOWN, Depress 4 = STOP.
- Enter programming mode by holding the programming button until the LED lights (~2 sec) — motor will jog.
- Press the programming button on the Telis transmitter or RTS sensor to memorize it — LED blinks and motor jogs to confirm.
- Test the DOWN direction using the radio transmitter.
Safety warning: If the treatment moves the wrong direction (up/in instead of down/out), turn off circuit breakers and reverse the red and black motor wires. Failure to correct this will cause damage to the awning by extending it during windy conditions.
Operating Procedures
- Remote Only Control: UP moves the treatment up/in; DOWN moves it down/out; MY stops or moves to the programmed intermediate position (must first stop at a limit before recalling the intermediate position).
- Wind Only Operation: requires memorizing an Eolis Sensor RTS/Wirefree. Set the desired wind speed threshold — exceeding it triggers UP after 2 seconds; manual override via transmitter is permitted only after wind drops below the threshold for 1 minute.
- Sun and Wind Operation: requires a Soliris Sensor RTS, or a combined Eolis Wirefree + Sunis sensor. Set both wind speed and sun intensity thresholds. Wind override behaves as above. Sun intensity exceeding the setting (with no wind) triggers a DOWN command after a 2-minute delay (to the intermediate position if set, otherwise the lower limit). If sun intensity later drops below the set level, the awning automatically retracts after a 15–30 minute delay (assuming no wind).