
Qolsys IQ Wi-Fi Router System — Installation & Configuration Manual
Complete installation, configuration, and troubleshooting guide for the Qolsys/Johnson Controls IQ Wi-Fi Router System, a mesh Wi-Fi router that integrates with IQ Panel security systems.
Full text manual (for reference)
Installation and configuration guide for the Qolsys/Johnson Controls IQ Wi-Fi Router System — a mesh Wi-Fi router with an optional add-on network of up to 8 agent nodes, designed to integrate with the IQ Panel security/smart-home system. This guide covers hardware setup, IQ Panel-based configuration, web-interface administration, and troubleshooting.
What's in the Box
- IQ WiFi controller unit
- Power supply
- Ethernet cable
- QR code sticker (for quick wireless setup)
Hardware Overview
- Front: LED status lights — Error, Internet connected, Broadcasting wirelessly, Power on
- Back: Reset button (short press = restart, hold 15 sec = factory default), DC-IN power jack, LAN port (network out), WAN port (internet in), WPS button on the side
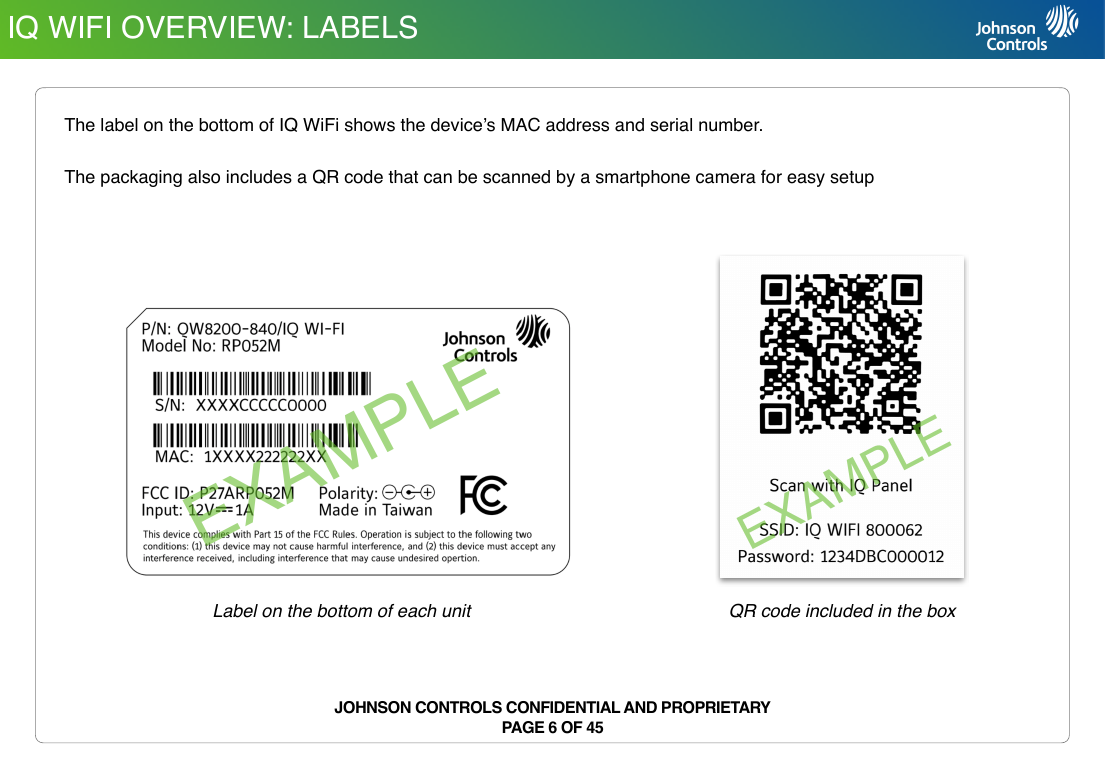
- Labels: The bottom label lists the MAC address and serial number; the box QR code auto-connects to the default network (SSID/password) when scanned by an IQ Panel
Choosing an Installation Type
- As the only wireless network: improves connectivity for all Wi-Fi devices, supports the entire network.
- In parallel with an existing network: keeps security/smart-home devices private and hidden from other Wi-Fi devices, makes remote support easier since only known/authorized devices connect.
One IQ WiFi unit covers up to 1,500 sq ft; add up to 8 additional agent nodes to eliminate dead spots. Note: IQ WiFi cannot increase the speed coming from the ISP, only improve coverage — building materials and interference can still limit range.
Installation Overview
Connecting the Wires
- Plug the power supply's barrel jack into the "DC-IN" port.
- Connect the provided Ethernet cable into the "WAN" port.
- Connect the other end of the Ethernet cable into the "ETHERNET" port on the modem (or, for parallel installs, into an available port on the customer's existing router — in this case IQ WiFi defaults to Controller mode when it detects internet on the WAN port).
- Plug the power supply into the wall outlet. Boot-up can take up to 3 minutes.
Setting Up the Network (via IQ Panel)
- Wait for the IQ WiFi power LED to stop flashing.
- On the IQ Panel: open Settings tray → Settings → Advanced Settings → enter installer code → Wi-Fi.
- Touch "WPS Push Button," then touch "CONNECT."
- Press the physical WPS button on the IQ WiFi unit.
- The IQ Panel confirms when the connection completes (repeat from step 1 if it fails).
Manual connection alternative: choose network name (SSID) "IQ WIFI XXXXXX" (X = last 6 digits of the MAC address on the unit's label). Default password is the unit's serial number.
Adding Additional Agents (Mesh Nodes)
Up to 7 additional agents can be added to extend coverage. Agents must be within wireless range of the controller to sync.
- Choose agent placement to maximize mesh coverage; ensure an available power outlet.
- Power up the agent (tip: pair it near the controller first, then relocate once paired).
- Once the agent's power LED stops flashing, activate WPS on the controller, then on the agent.
Managing IQ WiFi from the Web Interface
- Log in at 192.168.105.1 in a browser (Chrome recommended). Default username: admin. Default password: the S/N printed on the bottom label.
- WAN Settings: Network tab → Advanced → WAN tab. Choose connection type: Static Address, DHCP Client, or PPPoE.
- LAN Settings: Network tab → Advanced → LAN tab. Change the IPv4 address / netmask (router gateway address).
- DHCP Reservation: Network tab → Static Leases. Enter a hostname, select the device's MAC address from the dropdown, select the IPv4 address to reserve, then Save & Apply. This locks a device to a permanent IP.
- Change Admin Password: System tab → Change Password → enter a new password → Save & Apply.
- Additional web-based options include renaming the default network name (SSID), creating a guest network, connecting additional agents, and pushing software updates.
Connecting to the Network
- Wired: Connect a laptop to the LAN port on the controller or an agent, then browse to 192.168.105.1 (default gateway).
- Wireless: Default SSIDs are "IQ WIFI XXXXXX" (2.4GHz) and "IQ WIFI XXXXXX 5G" (X = last 6 digits of MAC address), or scan the included QR code. WPS is also supported.
- Default username: admin. Default password: the unit's serial number (case-sensitive).
Troubleshooting
Sequence to Restart Your Network
- Unplug the modem, then power it back up.
- Unplug the IQ WiFi, then power it back up.
- (If applicable) Unplug the network switch, then power it back up.
- Unplug agents, then power them back up.
Controller and Agents Won't Sync
- Move the agent into the same room as the controller for the sync process only.
- Connect the agent to power and wait for its power LED to light solid green.
- Press WPS on the controller, then within 2 minutes press WPS on the agent.
- Wait for the agent's internet LED to light solid green (Wi-Fi LED blinks green while communicating).
- Move the agent to its final location and reconnect power; confirm the power LED is solid green. A red error LED means the agent is out of range — move closer and retry.
Can't Log Into the IQ WiFi
Confirm your computer or IQ Panel is connected to the IQ WiFi network (Wi-Fi or Ethernet). If you changed the admin password and forgot it, reset the unit to factory defaults using the reset button (hold 15 seconds).
Network Connectivity Issues
- Confirm your device is connected to the IQ WiFi network.
- If connected but no internet, check the connection at 192.168.105.1 (default gateway).
- Log in (admin / serial number password).
- Go to Network → Advanced, and check the WAN Internet IPv4 section for an assigned IP address.
- If it shows 0.0.0.0, the router did not obtain an IP from the ISP or existing network — try the network restart sequence above.
- If still unresolved, the ISP may require a login (PPPoE) with a login name/password that needs to be set correctly.
Specifications
| Processor / Memory | MT7621DA SoC (dual-core 880MHz), 64MB SPI NOR Flash, 128MB DDR3 |
| Connectors | 1 DC power jack, 2 RJ-45 connectors |
| LEDs / Buttons | 4 single-color LEDs; 1 WPS button (side), 1 reset button (back) |
| Antenna | 4 internal Wi-Fi antennas |
| Power | Input: 100–240VAC, 50–60Hz, 0.3A max. Output: 12VDC, 1A |
| Dimensions | 150mm x 89mm x 57.2mm, 172g |
| Operating Range | 0°C–40°C (32°F–104°F), 10–90% RH non-condensing |
| Ethernet | LAN and WAN Gigabit Ethernet ports |
| Wireless | 802.11 b/g/n 2.4GHz, 802.11 a/n/ac 5GHz |
| DHCP | Server and Client, supports IPv4 and IPv6 |
| Guest Network | 2.4GHz / 5GHz supported |
| Mesh | Wi-Fi EasyMesh standard, Ethernet on-boarding, topology dump, OTA updates supported |
| Compliance | FCC; conforms to UL Std S985, 1023 & 1610, certified to ULC Sub C1023 & ULC Std S545 |