
HAI Music Gateway — Operation Manual
Operation manual for the HAI Music Gateway whole-home music server/renderer with three independent stereo channels.
Full text manual (for reference)
Operation manual for the HAI Music Gateway — a whole-home music server/renderer with three independent stereo channels, designed for use with an HAI OmniTouch 5.7e, 10p, or 10pe touchscreen and HAI Hi-Fi or other audio distribution systems.
Overview
The HAI Music Gateway streams music throughout the home when connected to an HAI Hi-Fi or other audio distribution system. Using an HAI OmniTouch 5.7e, 10p, or 10pe touchscreen, you can browse and select music by album, artist, track, genre, or playlist, with album art and metadata displayed for each selection.
The Music Gateway also includes WL3, HAI's home control and IP camera integration software, which allows control of an entire home automation system from any PC web browser or mobile device (iPhone, BlackBerry, Windows Phone, Android). WL3 can record and play video from IP cameras based on system events such as motion, alarm, or door openings.
Music can be loaded from a computer and stored on the internal hard drive (thousands of song titles), with album cover art loaded automatically. Song selection is controlled via the IP-based OmniTouch touchscreens.
Package Contents
- HAI Music Gateway
- AC power adapter
- Power cord
- Operation manual
Front & Rear Panel
| Component | Description |
|---|---|
| Power LED (front) | Illuminates blue when powered up and running |
| Power Input Jack (DC, rear) | Connect the supplied AC adapter here |
| Power Button (rear) | Momentary press starts (if off) or shuts down (if on) the unit |
| Keyboard Port (rear) | PS/2 keyboard connection, if needed |
| Mouse Port (rear) | PS/2 mouse connection, if needed |
| VGA Port (rear) | Connect an external VGA monitor, if needed |
| USB Ports x4 (rear) | USB Type A peripherals such as keyboard/mouse |
| Ethernet Port (rear) | Standard network cable to a switch/router on the local network |
| Stereo Output Jacks x3 (rear) | 3.5mm male stereo patch cable to each Hi-Fi/audio distribution input — Channels 1, 2, 3 |
Connecting the Music Gateway
To operate the Music Gateway, three connections are required: power, audio outputs, and network (LAN).
Power
- Plug the AC adapter cable into the Power Jack on the Music Gateway.
- Plug the power cable connector into the AC adapter.
- Plug the AC adapter into an electrical outlet.
Audio Outputs
Connect each output on the Music Gateway to an audio input on a Hi-Fi or other audio distribution system (e.g. a Hi-Fi RIM — Remote Input Module) using a 3.5mm male stereo patch cable, one per channel (1, 2, 3).
Network
Connect a standard network patch cable between the Ethernet Port on the Music Gateway and a port on your local network (switch, router, etc.).
Getting Started
Turning On
- Momentarily press the Power Button to turn on the Music Gateway.
- The Power LED should illuminate blue.
- Wait about 1 minute for the unit to boot up before trying to access it.
Enabling the Music Gateway (via HAI Automation Studio)
A custom touchscreen design must be used to operate the Music Gateway from an OmniTouch 5.7e, 10p, or 10pe touchscreen. HAI Automation Studio is used to enable/configure the Music Gateway, assign audio outputs to source inputs, and push the updated design to each touchscreen.
Adding the Music Gateway to the Touchscreen Design
- Start HAI Automation Studio and create a new project.
- Add a touchscreen design to the project.
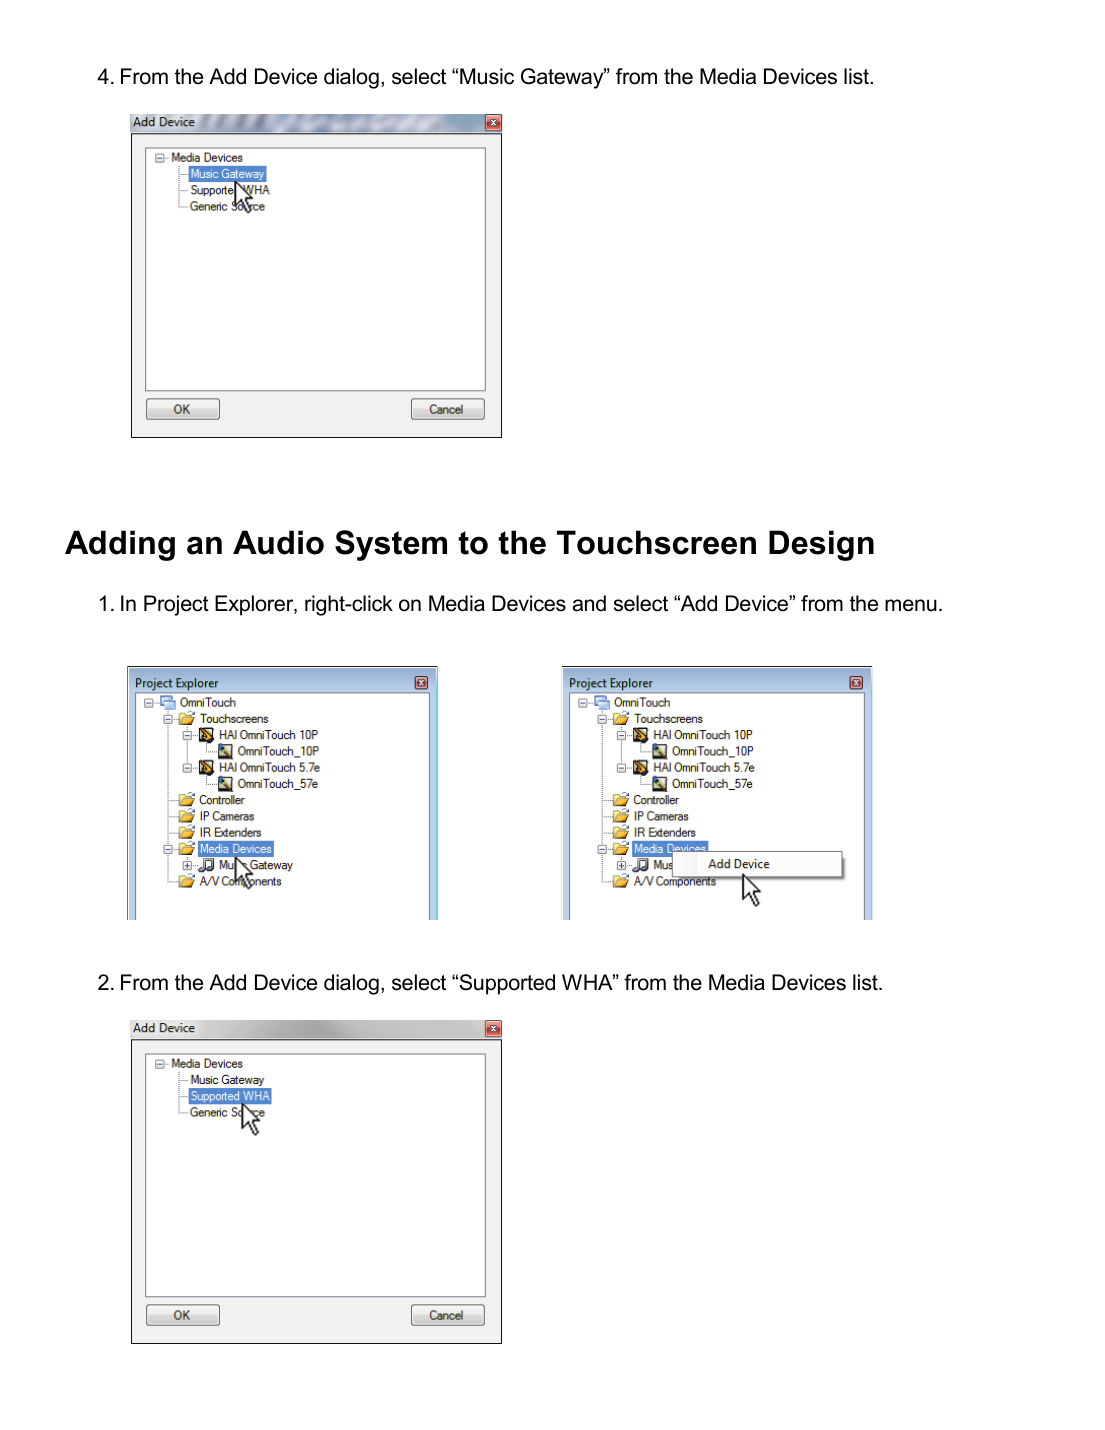
- In Project Explorer, right-click Media Devices and select "Add Device."
- From the Add Device dialog, select "Music Gateway" from the Media Devices list.
Adding an Audio System to the Touchscreen Design
- In Project Explorer, right-click Media Devices and select "Add Device."
- From the Add Device dialog, select "Supported WHA" from the Media Devices list.
Assigning Audio Outputs
When a Music Gateway is added to the touchscreen design, two folders are automatically created: Media Sources (the Music Gateway's audio outputs) and Media Services (the media types available to it).
- In Project Explorer, expand the Music Gateway device to display the Media Sources folder, then expand it to see the available channels.
- Right-click a channel and select "Assign Outputs."
- In the Input Mapper dialog: select the audio output (Channel 1, 2, or 3), select the Media Endpoint (audio distribution system), and select the destination source on that system.
- Press OK when complete.
Using the Interface
From the Menu Bar on an OmniTouch 5.7e, 10p, or 10pe touchscreen, select the "Media" icon to display the Music Gateway media page.
Browse the Media Library
- Press the Browse button to display the available media services.
- Select a media service to browse its content. Press the back button at any time to return to the previous menu.
- If Media Library is selected, browse by playlist, genre, artist, album, track, or Now Playing.
- Select an album (for example) from the list to play it immediately, or press the "+" sign to add it to the Now Playing queue.
Selecting a New Music Source
- Press the Source button to display available music sources.
- Select the audio output (Channel 1, 2, or 3) or another available source.
- Press the unlock icon to lock a source so no one else can change the media for that channel. A lock icon indicates the Now Playing media should not be changed. Press the lock icon again to unlock.
Selecting a New Audio Zone
- Press the Zone button to display available audio zones.
- Select the zone you want to control with the touchscreen.
Safety Precautions
- Do not attempt to service the Music Gateway yourself — always follow installation instructions closely.
- Confirm correct voltage before powering on. Use only the approved AC adapter and power cord — a different AC adapter risks fire or explosion.
- If using an extension cable, ensure total ampere draw of connected products does not exceed the extension cable's rating.
- Do not install with power turned on (risk of electric shock). Do not install in a very humid environment (risk of electric shock).
- Avoid direct sunlight or heat exposure (risk of deformation/damage).
- If moved between very different temperature/humidity environments, allow time for condensation to evaporate before use.
- When disconnecting a cable, pull on the connector or strain-relief loop, not the cable itself; keep connectors evenly aligned when reconnecting.
- Do not remove the product cover (risk of electric shock). Do not dismantle, repair, or modify the product — refer servicing to qualified personnel.
- Do not use in areas with flammable materials (propane, gasoline) or heavy dust (risk of explosion/fire).
- Clean only with a dry cloth, power off first — do not use water, thinner, or organic solvents.
Regulatory Compliance
This device complies with FCC Part 15 rules (Class B digital device) and is designed to provide reasonable protection against harmful interference in residential installations. If interference to radio/TV reception occurs, try: reorienting/relocating the receiving antenna, increasing separation between the equipment and receiver, plugging the equipment into a different circuit, or consulting a technician. Do not make unauthorized modifications to the equipment.
Manufacturer
Home Automation, Inc. (HAI), 4330 Michoud Blvd., New Orleans, LA 70129 — Tel: (504) 736-9810