
Ezlo Protect Dealer Quick Start Guide
Quick start guide for dealers setting up the Security Partner Portal and completing installations with the Ezlo Installer app.
Full text manual (for reference)
The Ezlo Protect Dealer Quick Start Guide walks security dealers/installers through setting up the partner portal (branding, contacts, installer accounts, customer management) and completing an installation with the Ezlo Installer mobile app — adding a controller, pairing devices, verifying the system, configuring security modes, enabling Central Monitoring, and running Test Mode.
Partner Portal Setup
- Branding — Log in at security.mios.com, go to Settings → Customization → Branding to upload your logo and set a font color.
- Contact Info — Settings → Contact Info lets you specify your company's support phone, email, and website details.
- Installers — Installer accounts are for the technicians who set up automation systems for customers. Create them under Users → Create User, selecting the "Installer" role. A verification email with username/password is sent automatically to the new installer.
Customer Management
Create a new customer via Customer → New Account → Create Customer (or Dashboard → Create Customer). There are four stages:
- Basic account details — contact and address info; the "Installation Address" is where the controller will be located. Select the responsible installer from the "Select Installer" menu. Enter Emergency Contact Information — this is who the Monitoring Team contacts if a security event occurs, along with a required PIN code the response team will request to verify identity.
- Select Package — choose the customer's service package.
- Configure CMS — only if the customer has Professional Monitoring service.
- Additional details and finalization — configure emergency contacts for the new user, then click "Create Account." A welcome email with account credentials is sent to the customer.
Installation (Ezlo Installer App)
Installer App Flow
- Log into the Ezlo Installer app (iOS/Android) with your installer credentials.
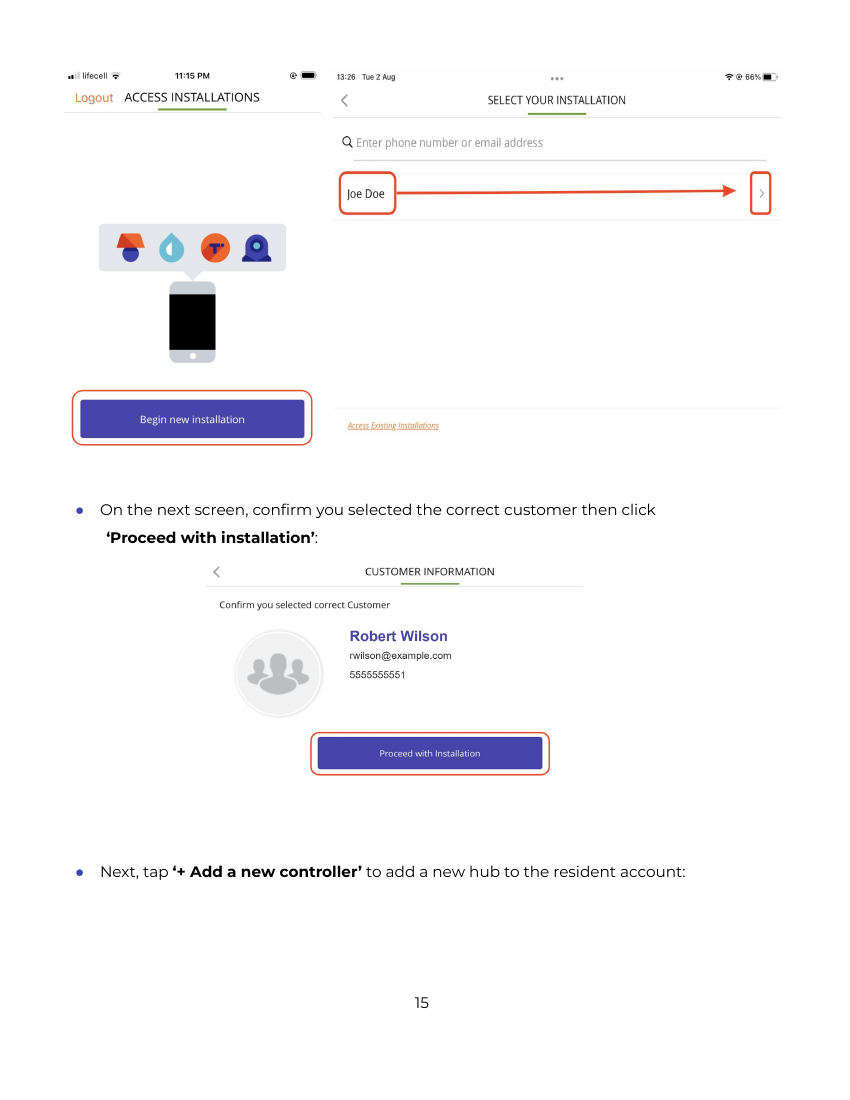
- Tap "Begin new installation" to view pending customer installations assigned to your account.
- Locate the customer and tap the arrow next to their name, confirm you selected the correct customer, then tap "Proceed with installation."
Add Controllers
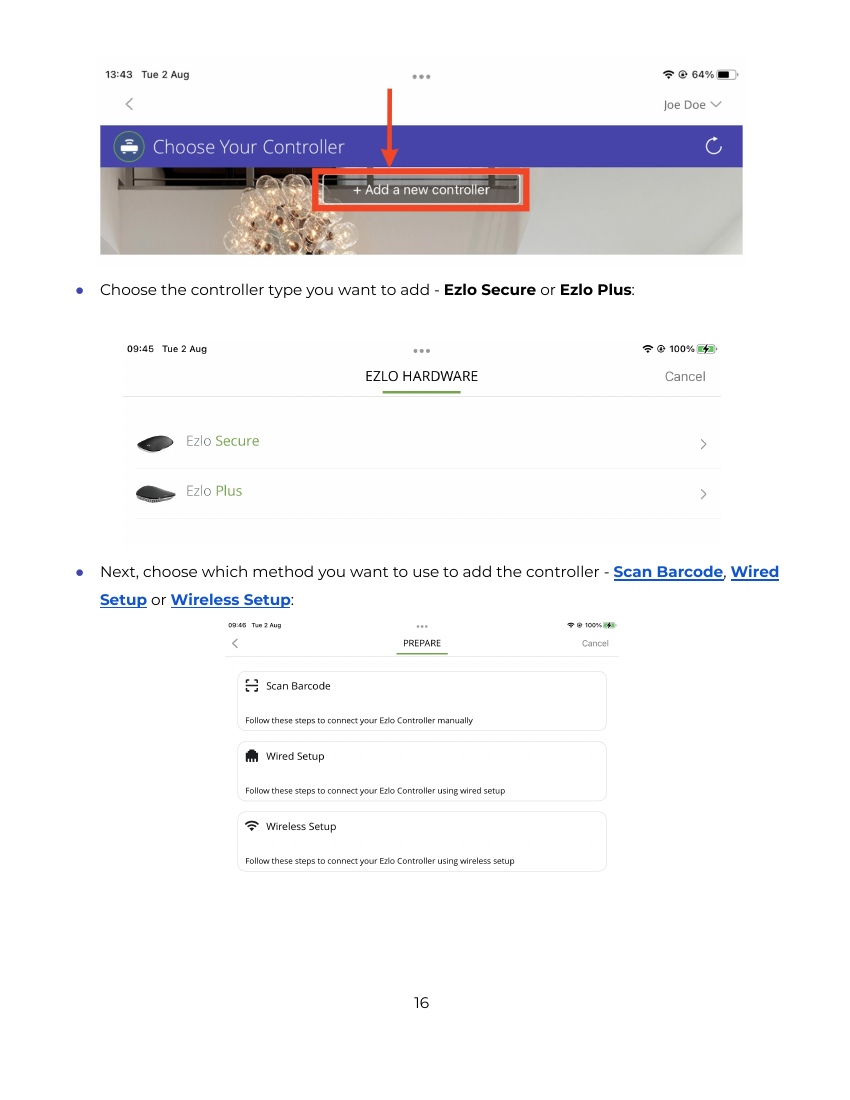
- Tap "+ Add a new controller" to add a new hub to the resident account.
- Choose the controller type: Ezlo Secure or Ezlo Plus.
- Choose the setup method: Scan Barcode, Wired Setup, or Wireless Setup.
Scan Barcode
Before scanning, confirm the controller is connected to power and to the network via LAN cable, and the controller LED is blue. Use your phone/tablet camera to scan the barcode on the back of the hub. If the scan fails, tap "Add Manually" to enter the serial number and MAC address directly, then tap "Add Controller."
Wired Setup
Confirm the controller is powered, connected via LAN cable, the LED is blue, and your mobile device is on the same network as the controller. Tap "Connect" to add it. If this fails, retry or fall back to "Scan Barcode."
Wireless Setup
- Make sure the controller is connected to power.
- Open your mobile device's native Wi-Fi settings and connect to the controller's Wi-Fi network — named after its serial number (e.g. "wifi_92002819").
- Enter the password printed on the bottom of the controller when prompted.
- Return to the Ezlo app, select the network you want the controller to join, enter that network's password, then tap "Connect."
- A confirmation screen appears once the connection succeeds.
Pair Devices
Once connected to the controller, tap "Start" on the confirmation screen (or reconnect to the controller) to open the device pairing wizard. Select a device category (e.g. Cameras), choose the specific model (e.g. VistaCam 1103), then follow the on-screen pairing instructions for that device.
Verify the Installation
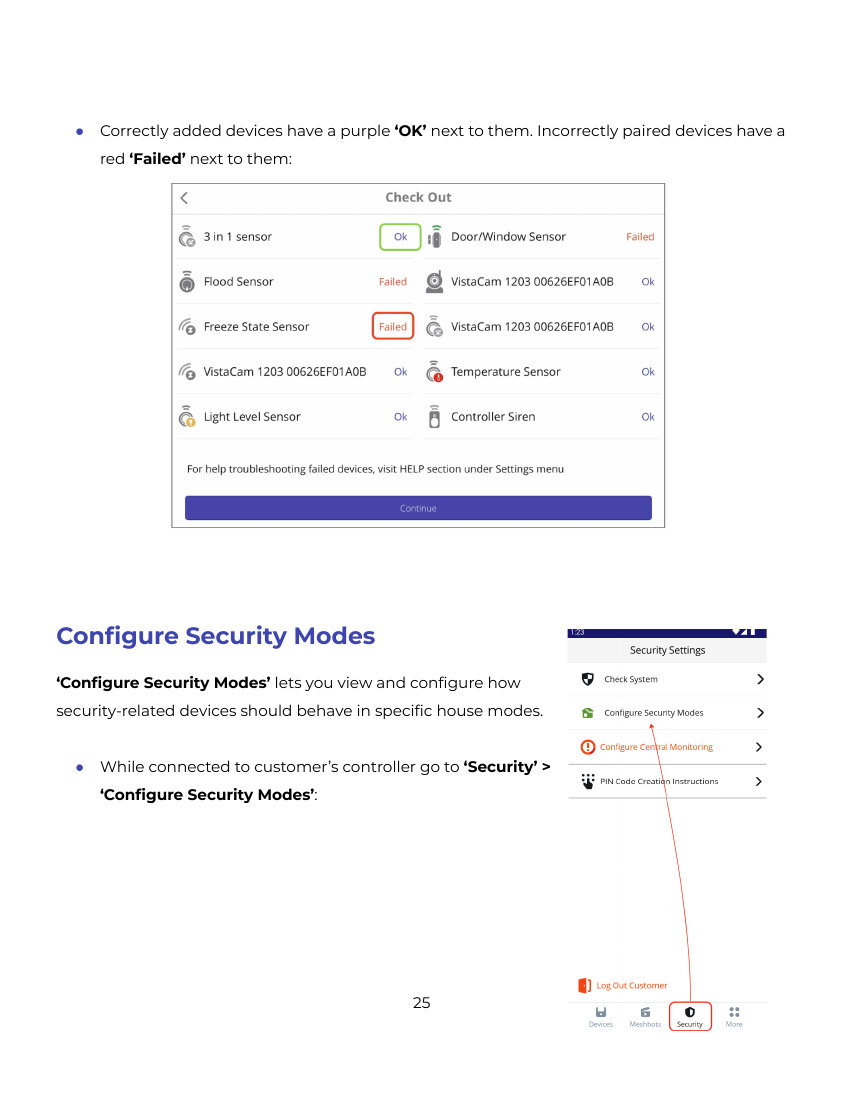
Tap Security → Check System to confirm all devices and controllers are functioning correctly. Correctly added devices show a purple "OK"; incorrectly paired devices show a red "Failed."
Configure Security Modes
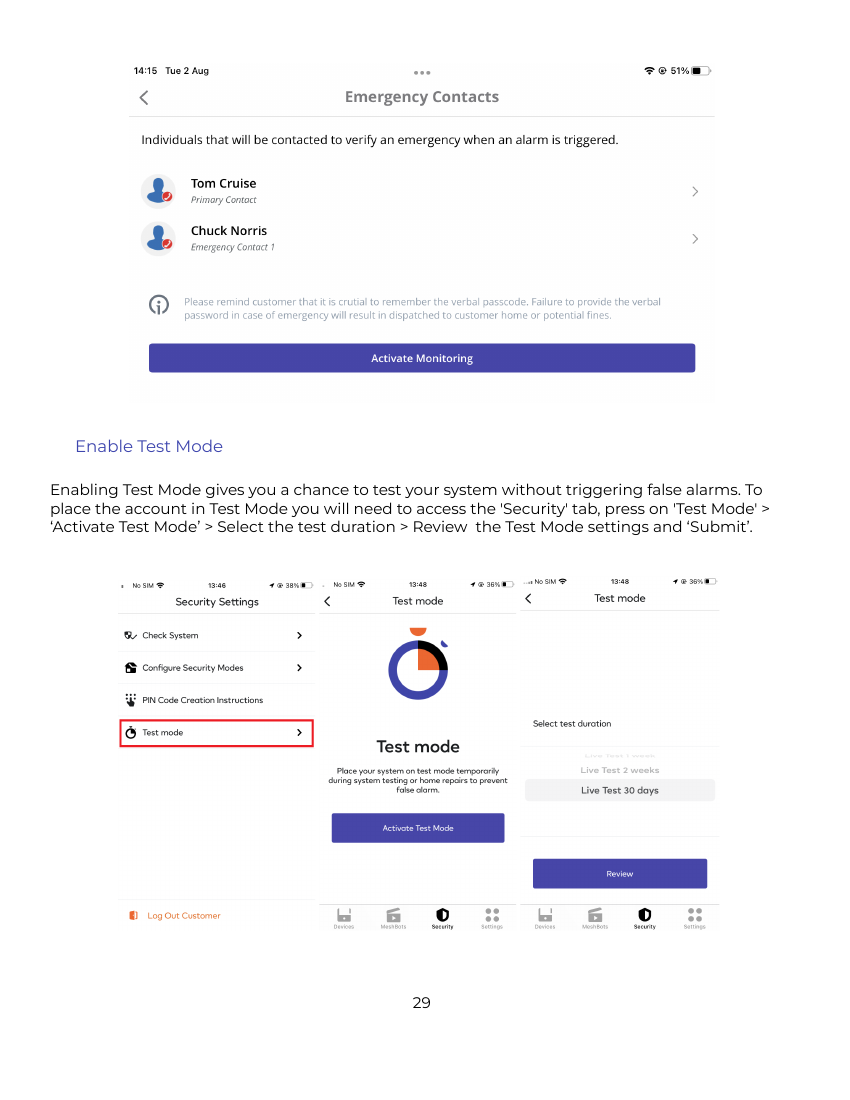
Go to Security → Configure Security Modes to view and set how security devices behave in each house mode. Select a mode with a single touch:
- Disarmed — disarms all sensors on the controller.
- Armed (Stay) — arms all sensors except motion sensors; used when the resident is home. Does not disable smoke, flood, CO, or glass-break sensors.
- Armed — arms all available sensors; used when the home is vacant.
Settings beneath the mode buttons let you configure armed-sensor behavior in detail.
Central Monitoring Station (CMS)
CMS refers to the Rapid-Response team that calls emergency services on behalf of the customer during a security breach. Activate it via Security → Configure Central Monitoring: complete the required customer information, tap "Proceed," then choose the emergency contacts the CMS team will reach out to if the alarm triggers (they must know the resident's PIN code, which the CMS team requests for verbal confirmation before proceeding). Tap "Activate Monitoring" once contacts are added.
Enable Test Mode
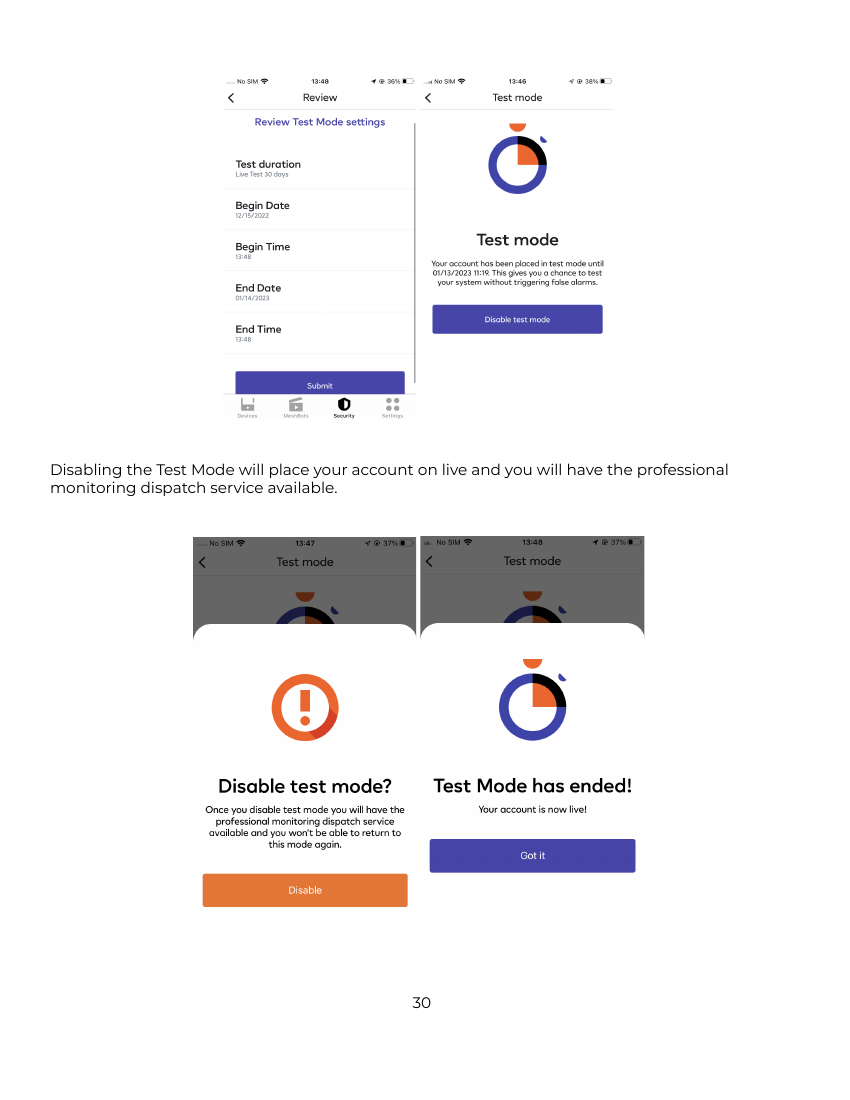
Test Mode lets you test the system without triggering false alarms. Go to Security → Test Mode → Activate Test Mode → select the test duration → review the settings → Submit. Disabling Test Mode returns the account to live status with professional monitoring dispatch active.
Finalize the Installation
Tap "Complete Installation" in the Security area to finalize. A confirmation message appears on success.
Log Out / Access Existing Controllers
Log out of the installation via Security → Log Out Customer. You can return to a previously added controller via "Access Existing Installation" → choose controller → "Proceed with installation" → "Connect." Note: existing (completed) installations are only accessible when the resident has granted access from their mobile app.