
Chief PIWRFUB — In-Wall Mount Installation Instructions
Installation instructions, dimensions, and adjustment procedures for the Chief PIWRF Series in-wall recessed mount for large flat panel displays.
Full text manual (for reference)
Installation instructions for the Chief PIWRF Series In-Wall Mount for large flat panel displays — a recessed, articulating mount that hides the entire arm mechanism inside the wall cavity. Model PIWRFUB includes a Universal Interface Bracket for displays without Chief's proprietary mounting buttons.
Critical Safety Warnings
- Improper installation can result in death or serious personal injury. This accessory should be installed by qualified personnel only.
- The structure this kit is attached to must support 5 times the combined weight of all equipment.
- Do not exceed the 200 lb (90.72 kg) combined weight capacity of the mount.
- Electrical shock hazard: Always confirm the wall cavity is free of electrical wires and cables before cutting, drilling, or installing fasteners.
- Explosion/fire hazard: Always confirm the wall cavity is free of gas, water, waste, or other plumbing before cutting or drilling.
- Displays can weigh in excess of 40 lbs (18.1 kg) — always use two people and proper lifting technique.
- Do not route cables through the holes in the faceplate.
Installation Overview
- Locate wall studs and determine desired mounting location and lateral shift (the mount allows up to 3-1/2" of lateral display offset from stud center).
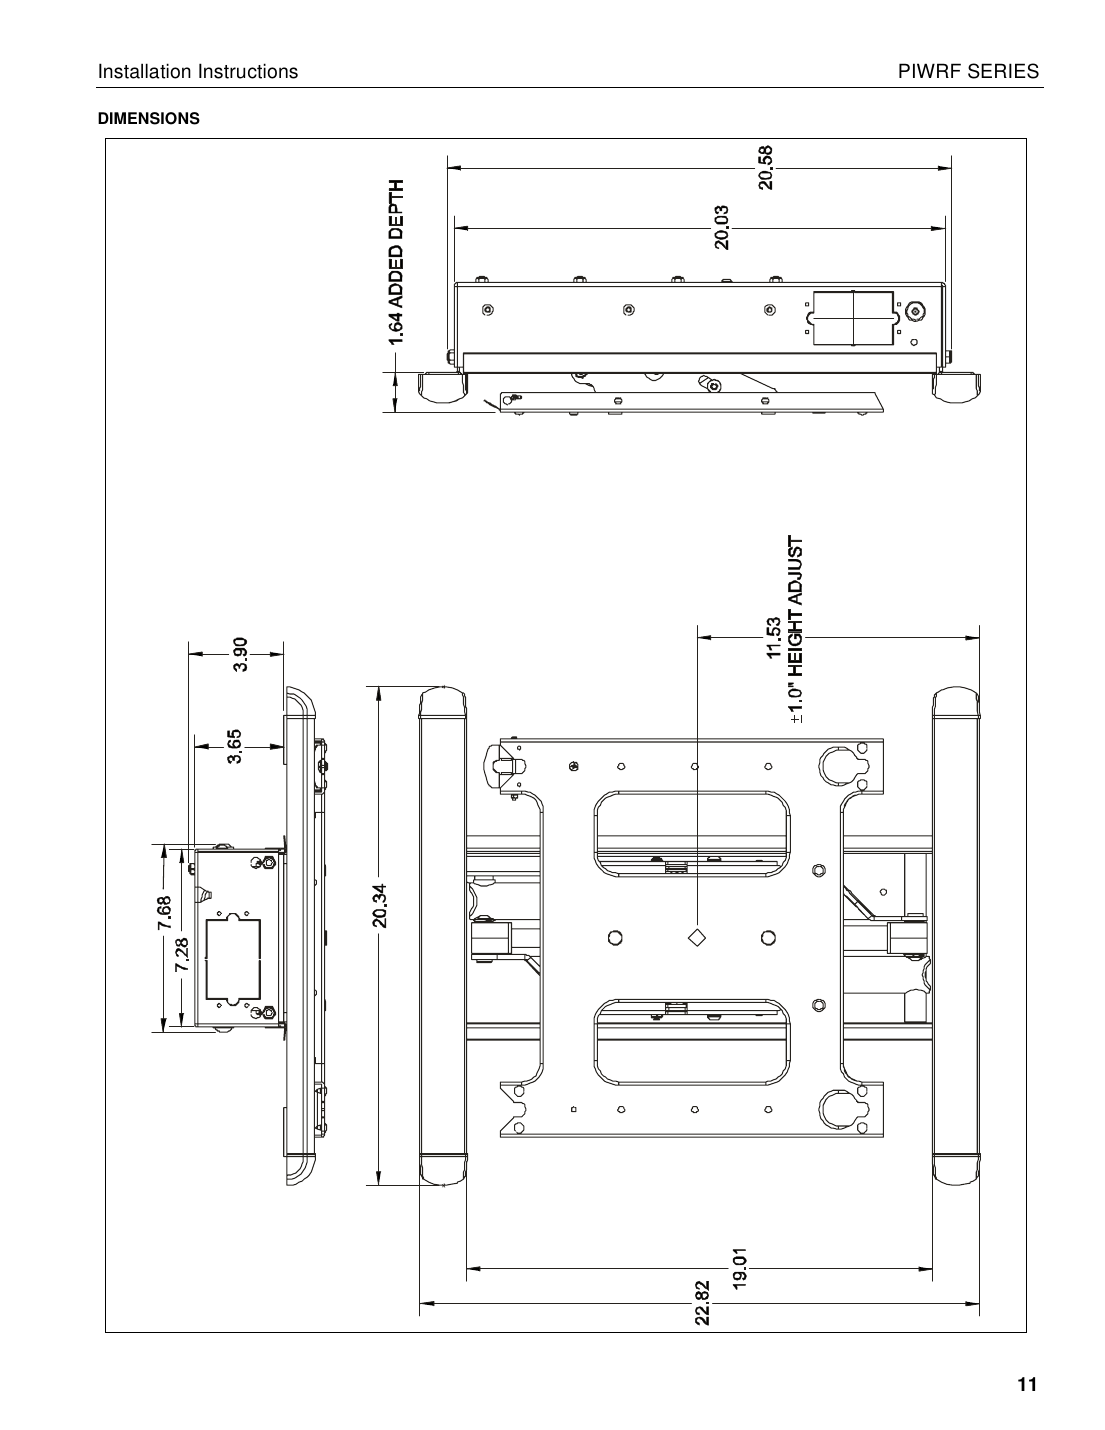
- Mark and cut the wall opening using the dimensions in the manual, then remove the drywall cutout.
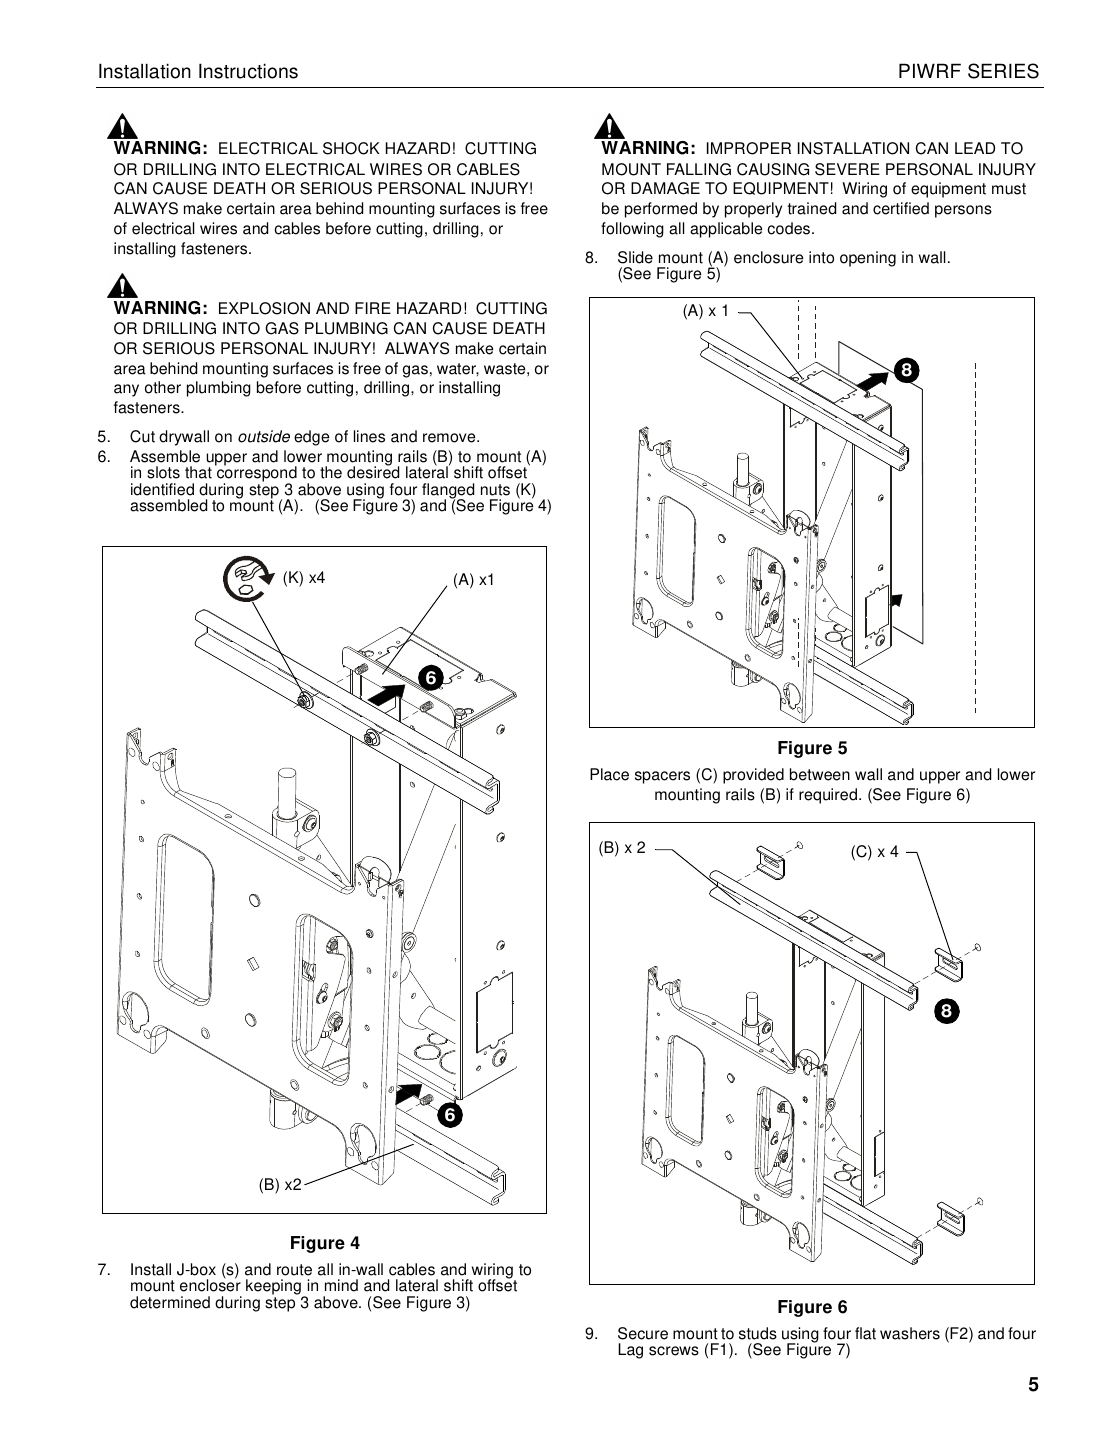
- Assemble the upper and lower mounting rails to the housing using the flanged nuts, in the slot position matching your chosen lateral shift.
- Install J-boxes and route in-wall cabling, keeping the lateral shift offset in mind.
- Slide the mount enclosure into the wall opening; add spacers between the wall and mounting rails if needed.
- Secure the mount to the studs with the four lag screws and flat washers provided.
- Install the wall channel covers and end caps.
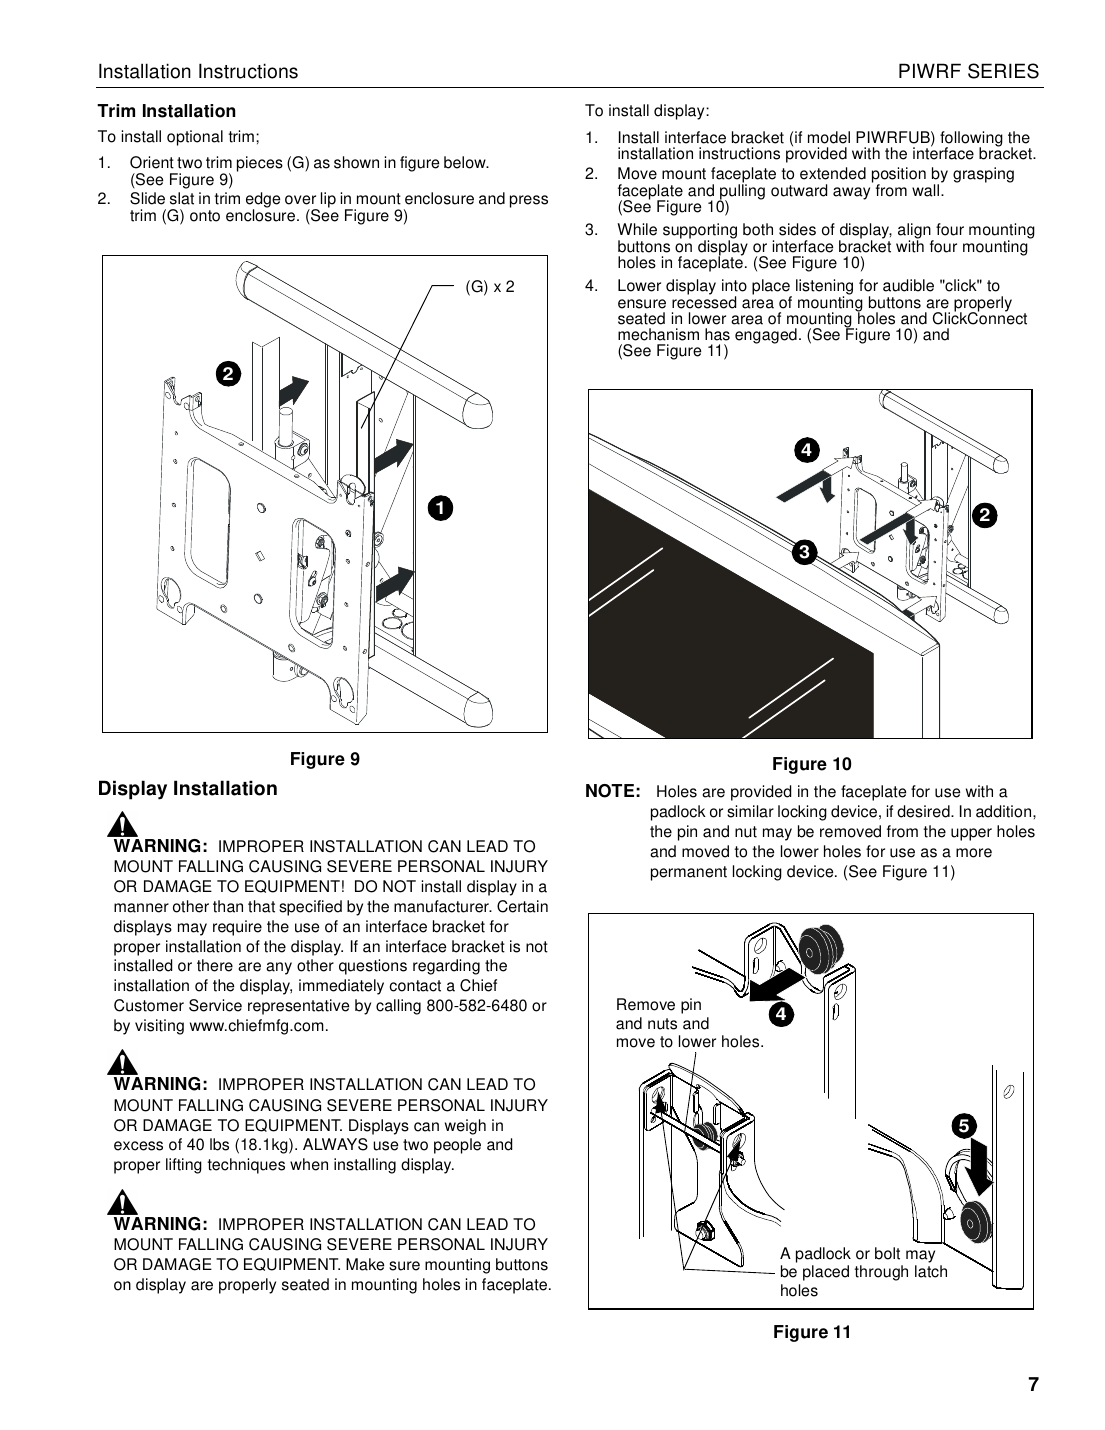
- Install the optional trim pieces if used.
- Install the interface bracket (required for model PIWRFUB) per its included instructions.
- Extend the faceplate, align the display's mounting buttons with the faceplate holes, and lower the display into place until you hear the ClickConnect engagement click.
- Route cables down the mount arms and secure with the cable covers provided; install cable tie clips as needed.
Adjustments After Installation
- Pitch tension: With the display installed, tighten or loosen the two side screws until the desired tension is reached.
- Roll (up to 2° left/right): Loosen the roll tension adjustment nut behind the faceplate, level the display, then re-tighten.
- Extend/retract tension: Adjust the screw with a hex wrench if the display is difficult to reposition (common with lighter-weight displays vs. the factory pre-set tension for near-max-capacity displays).
- Display height (up to 1" of travel): Loosen the adjustment locking screw, turn the adjustment nut to the desired height, then re-tighten the locking screw.
- YAW (up to 40.3° left/right of center): Loosen the adjustment screw with a hex wrench to set the desired swing tension.
Security
Holes are provided in the faceplate for a padlock or similar locking device. The pin and nut can also be moved from the upper holes to the lower holes for a more permanent locking option.
Specifications
- Series: PIWRF (In-Wall Mount for Large Flat Panel Displays); Model PIWRFUB includes Universal Interface Bracket
- Maximum combined weight: 200 lbs (90.72 kg)
- Lateral shift adjustment: up to 3-1/2" left or right
- Roll adjustment: up to 2° left or right
- YAW adjustment: up to 40.3° left or right of center
- Height adjustment: up to 1"
- Manufacturer: Chief Manufacturing, a division of Milestone AV Technologies — 8401 Eagle Creek Parkway, Savage, MN 55378 — 800-582-6480