
Channel Vision ST-3048W — 4.3" Touch Screen Intercom Installation Manual
Installation manual for the Channel Vision ST-3048W — a 4.3" SIP-based touch-screen IP intercom room station over a single Cat5 cable.
Full text manual (for reference)
Installation instruction manual for the Channel Vision ST-3048W — a 4.3" touch-screen SIP-based IP intercom room station for room-to-room communication over a single Cat5 cable. Works with every Channel Vision front-door IP intercom, offering hands-free communication and full-motion video of the visitor at the front door, plus a hard-key door strike release.
Specifications
| Spec | Value |
|---|---|
| Voltage | 12VDC / PoE |
| Rated Power | 4W |
| Standby power | 1.5W |
| Display | 4.3" capacitive touch screen, 480x272 |
| Operating Temperature | -10° to +50°C |
| CPU / Memory / Flash | Single-core 1GHz / 64MB / 128MB |
Pre-Network Settings
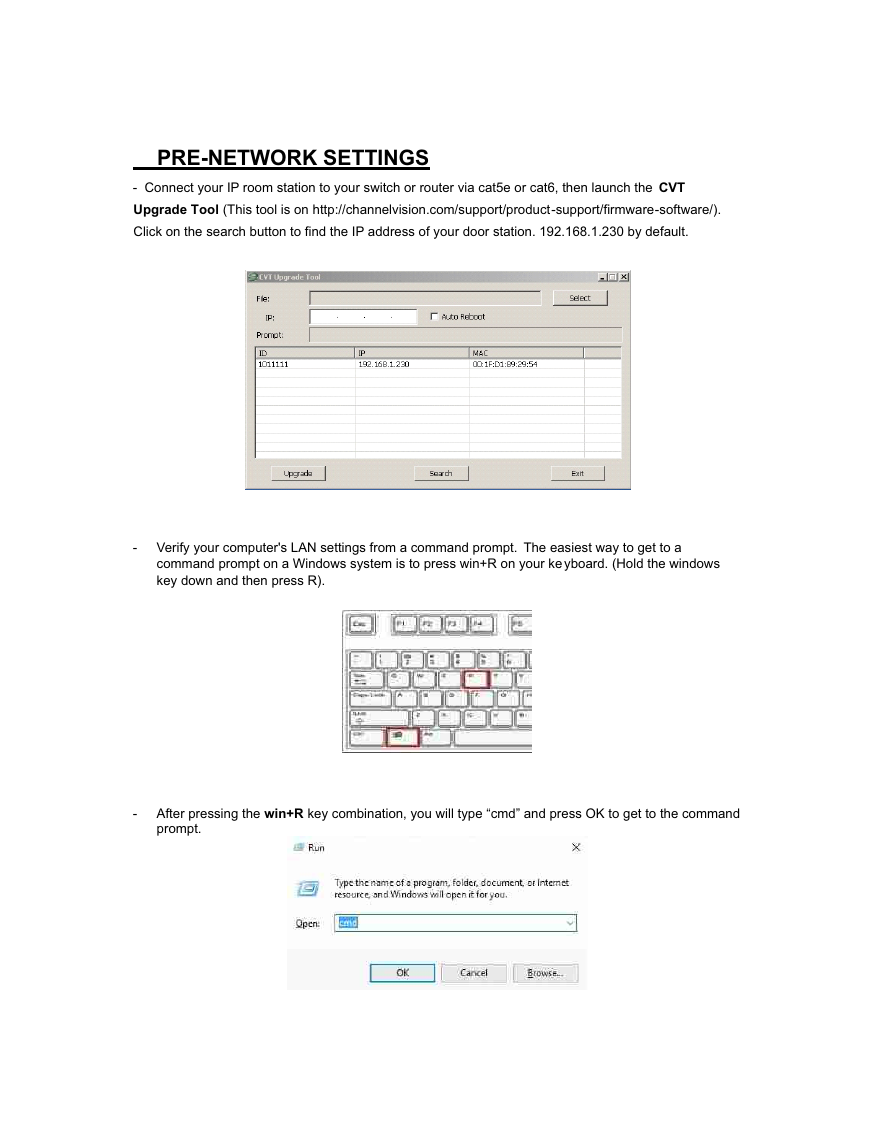
- Connect the room station to your switch/router via Cat5e or Cat6, then launch the CVT Upgrade Tool (available at channelvision.com/support/product-support/firmware-software). Click Search to find the door station's IP address (default 192.168.1.230).
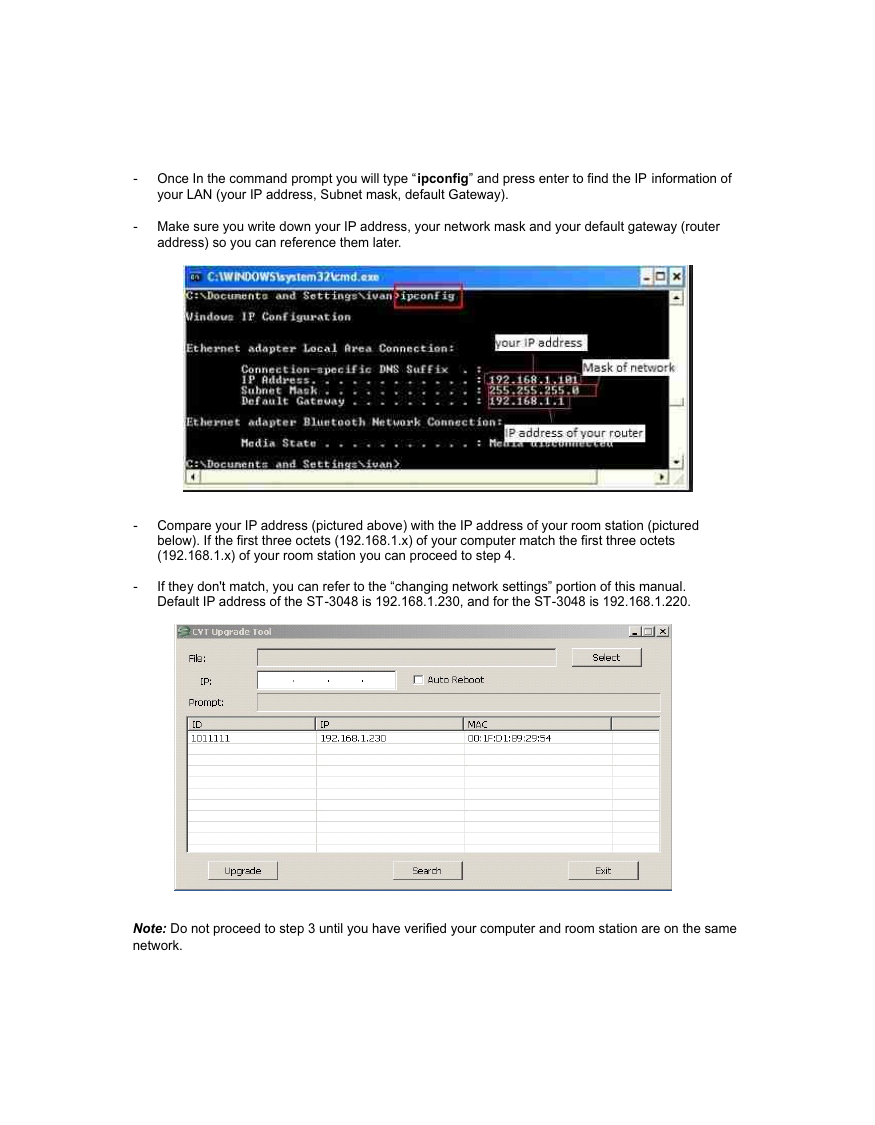
- Verify your computer's LAN settings: press Win+R, type
cmd, press OK, then typeipconfigand press Enter to see your IP address, subnet mask, and default gateway. Write these down for reference. - Compare your computer's IP with the room station's IP — if the first three octets match (e.g. 192.168.1.x), proceed. If not, see "changing network settings." Default IP for the ST-3048 room station is 192.168.1.220 (door station 192.168.1.230).
Accessing the User Interface
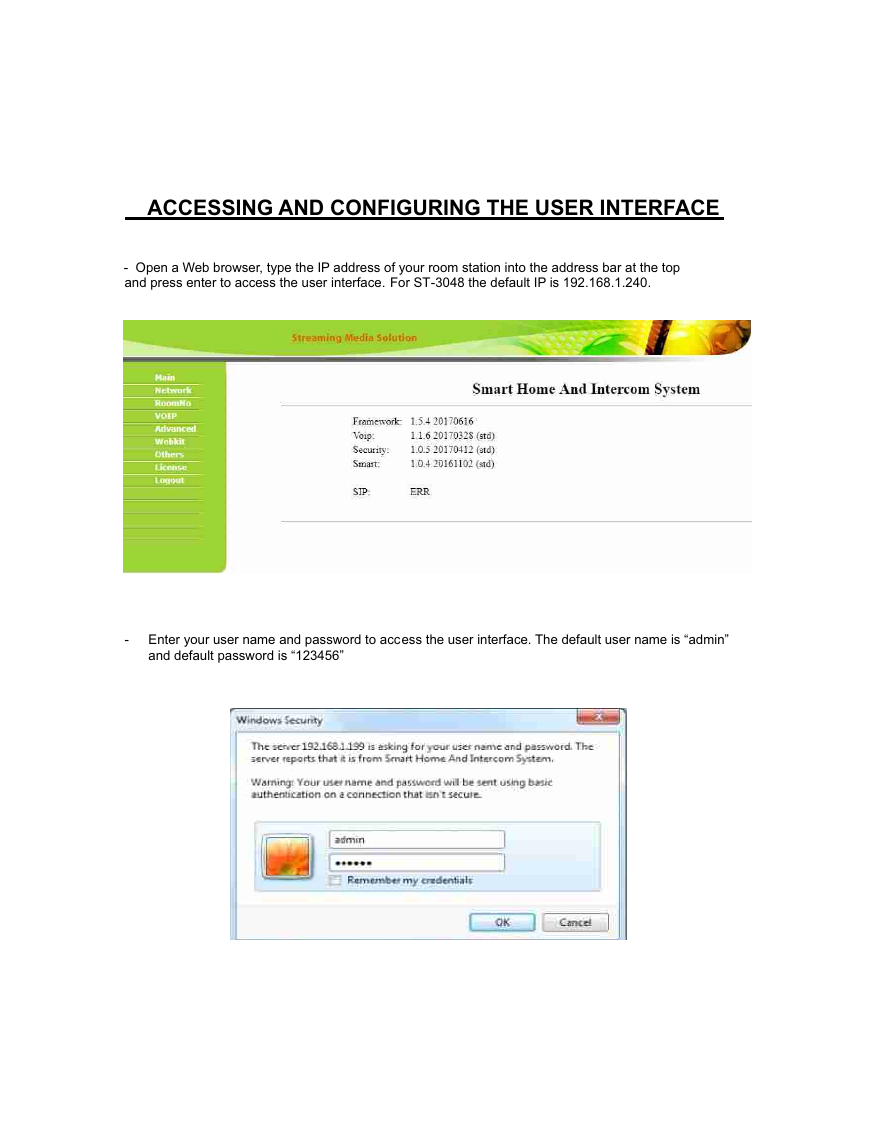
Open a web browser and type the room station's IP address into the address bar. Default login is username admin, password 123456.
Network Settings
- DHCP: Leave unchecked — keep the room station on a static address so you can manage it later.
- IP: Assign an address on your network for the room station.
- Mask: 255.255.255.0 (typical).
- Gateway: Your router's IP address (e.g. 192.168.1.1).
-
DNS: 8.8.8.8, or the DNS address your network already uses (find it via
ipconfig /all).
Touch Screen Room Settings
- Build / Unit / Floor: Must match SI-8000 device settings.
- Room: Two digits — see manual sections 4.1/4.2 for specific configurations.
- Device: Must start 0-9; no duplicate device numbers (including mobile phones).
- Sync: Syncs additional room stations together for intercommunication.
- Server: The management server address for MDU deployments, or your router address otherwise.
VoIP Settings
Check the SIP box to enable VoIP. For mobile visualization of door stations, the manual recommends the open-source Linphone app/server (sip.linphone.org) for Proxy, Realm, Outbound Proxy, and STUN settings; STUN Port defaults to 5060. User/Password are your Linphone account credentials — note that each room station and mobile phone needs its own Linphone account (think of it as an individual extension). Timeout is the call attempt duration (120–1800s). Confirm setup by checking that the SIP status shows "OK" on the Main screen.
Advanced Settings
- Ex Phone: SIP URL to forward calls to when the room station doesn't answer.
- Auto Pickup: Automatically answers incoming calls from another device.
- Quick Call: URL of a device dialed when pressing the "Center" button on the call screen.
- DTMF Unlock: Enables unlocking the door via a keypad-entered code (DTMF tones).
Website Settings
The touch screen can display custom web content/icons: Advertising (screensaver URL), Browser, Mall, GOV, Cook, and MAP icons can each be pointed at a web address of your choosing.
Wall Mounting
- Mount a 2-gang box.
- Run Cat5/Cat6 network cable through the bracket hole.
- Run 2-conductor power wire through the bracket hole (if not using a PoE switch).
- Secure top and bottom screws with a drywall anchor if necessary.
- Slide the touch screen down onto the mount from the top.
Warranty
Channel Vision Technology will repair or replace defects in material or workmanship, free of charge in the USA, for one year from the date of original purchase (through an authorized reseller) — no mail-in card needed. Mail-in service: call (714) 424-6500 for a Return Authorization number before shipping. Not intended for medical, life-sustaining, or critical-environment applications. Channel Vision Technology, 234 Fischer Avenue, Costa Mesa, CA 92626 · www.channelvision.com