
BlueSpray WiFi Irrigation Controller — User Manual
Complete setup and configuration guide for the BlueSpray WiFi web-based irrigation controller — wiring, zones, programs, schedules, and troubleshooting.
Full text manual (for reference)
User manual for BlueSpray — a WiFi, web-based irrigation controller that lets you program watering schedules remotely from any browser (computer, tablet, or smartphone) with no app to install. The base BlueSpray controller supports 8 zones; with expander boards, one controller can scale to 24 zones (residential) or 128 zones (commercial).
Installation
Controller Mounting
- Mount two large screws (provided) into the wall, 5 inches apart and leveled, leaving about 1/8" clearance between screw head and wall.
- Hang the controller onto the two screws — it slides down and settles into place.
- Open the access door and secure with the third screw.
Controller Wiring
- Connect valve wires to zone terminals 1-8 (left to right, top to bottom). If your system has more than 8 zones, additional expander boards sit underneath the main board — use terminals 1-8 on those too. Caution: do not connect a valve wire to the first terminal on an expander board; that terminal is reserved for a 24VAC power wire.
- Connect the master valve wire (if applicable) to the terminal marked "M".
- Connect the common wire to the terminal marked "COM".
- Connect rain/door sensor wires to the appropriate terminals (polarity doesn't matter here).
- Route all wires through the bottom of the controller and close the access door.
- Connect the power wire from the supplied power supply to the 24V and COM terminals.
- Confirm the reset switch is in the up (NORMAL) position.
- Plug in the power supply — the green power LED should stay on. The controller boots; wait until the amber status LED changes from solid to blinking, indicating it's ready.
Optional Garage Door Kit Wiring
- With the garage door closed, mount the door sensor (switch + wire terminal on the door frame, magnet piece on the door itself) — the two pieces must be no more than 1" apart when closed.
- Power off the controller, then wire the door sensor to the "Door" sensor terminal.
- Wire the Door Switch relay terminal to either the garage door wall switch or the motor terminals directly.
- Power the controller back on, connect to the UI, go to Settings → Sensors, and select "Close at" or "Close after" for the Door Sensor field, then Save.
- Test by clicking the garage door button on the Status Panel to confirm it opens/closes on demand.
First-Time Connection
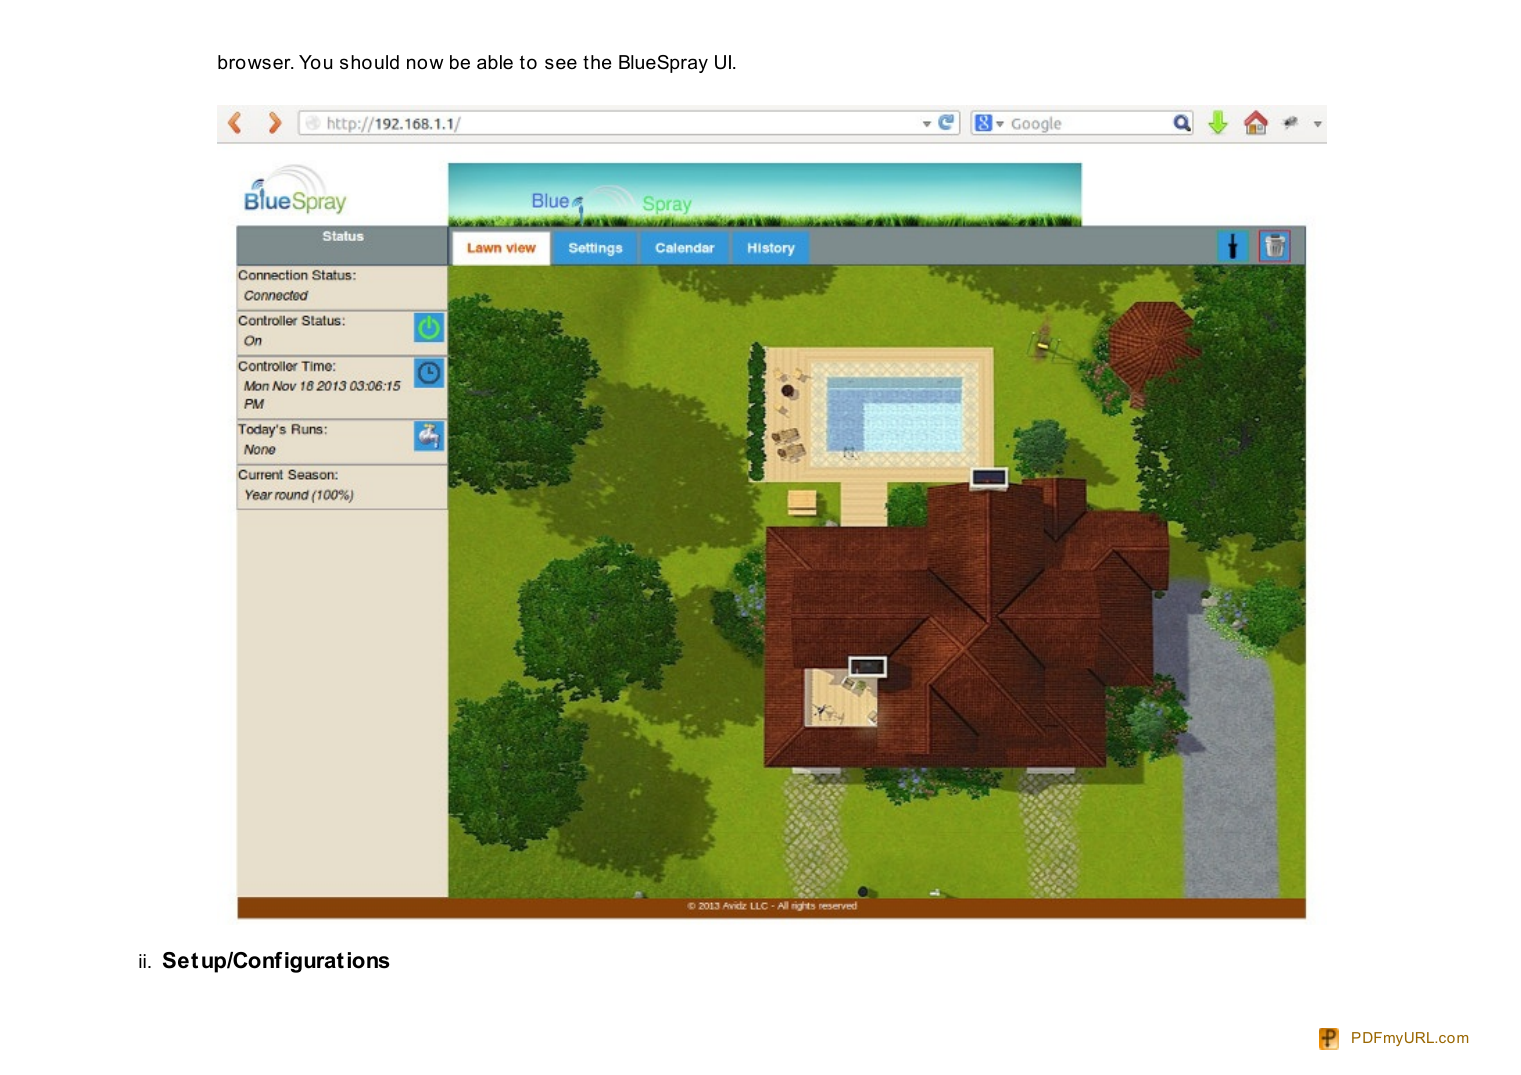
From a computer, laptop, or tablet with WiFi: connect to the "bluespray" wireless network (no password), then browse to http://192.168.1.1 to load the BlueSpray UI.
Configuration Overview
Zones (Stations)
Click "Lawn View" and drag the sprinkler head icon onto your lawn illustration to place a zone; zones are named in the order added. Click a zone icon to water it immediately ("Water now") or right-click/press-and-hold to rename or enable/disable it. Drag a zone to the trash icon to delete it.
Programs, Seasons, and Schedules
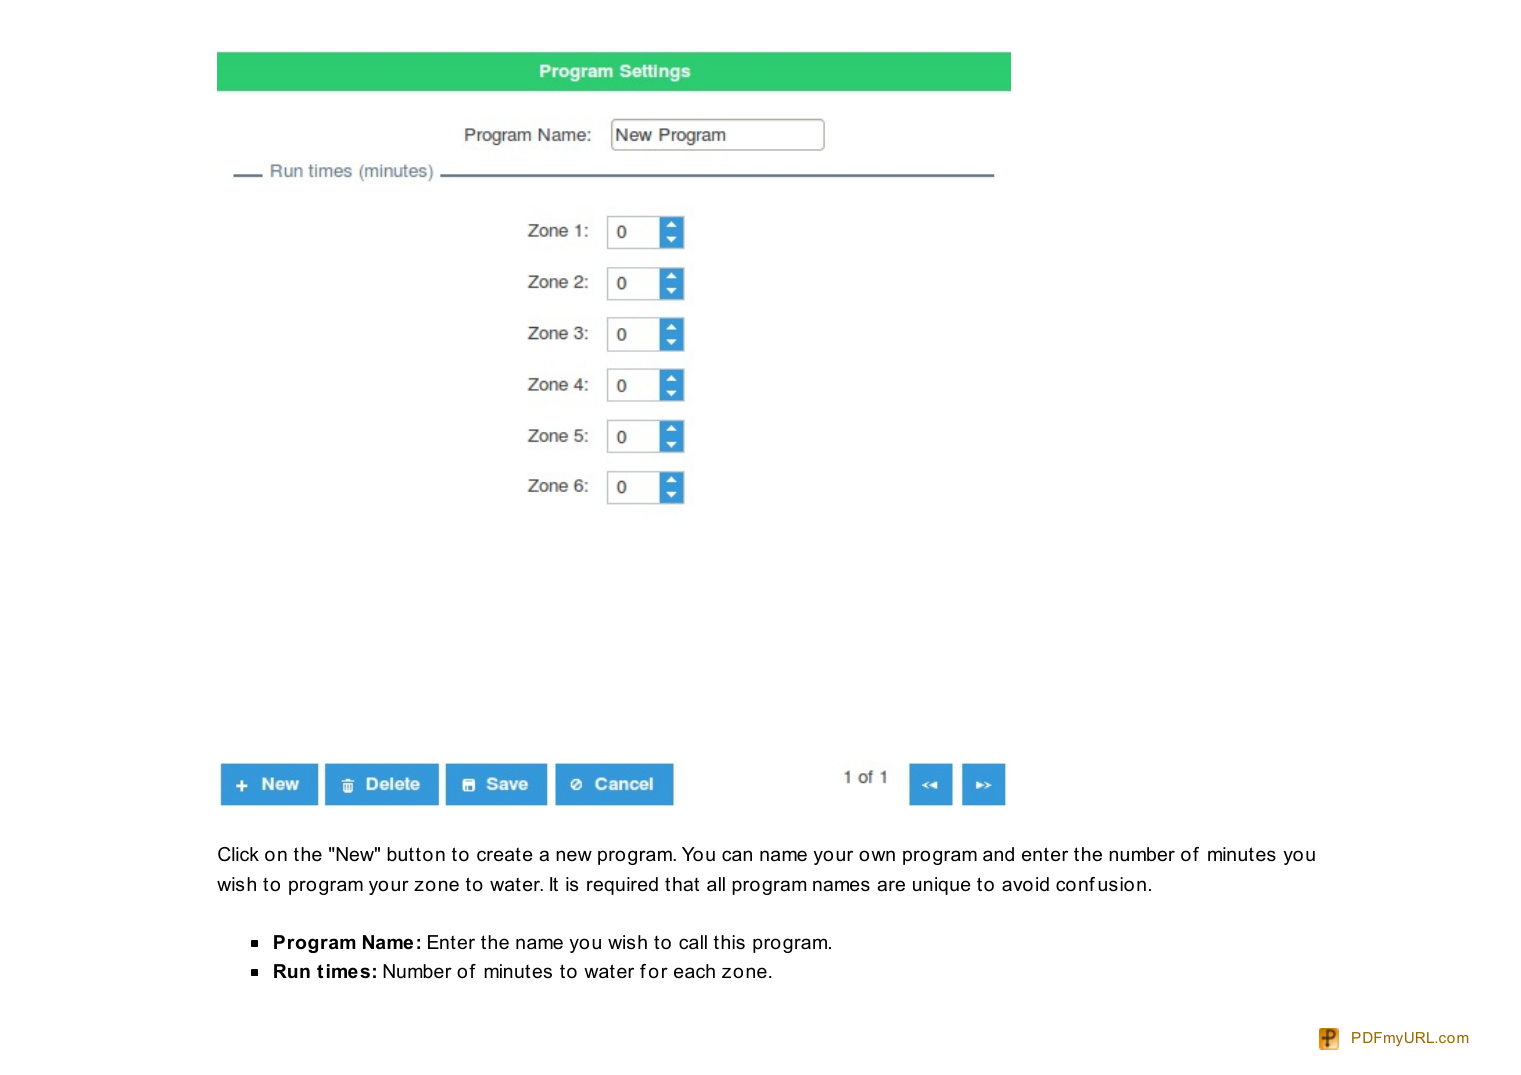
Under Settings, create Programs (a set of run times per zone), Seasons (date ranges with a watering percentage — e.g. 100% in summer, 50% in fall reduces a 10-minute run to 5 minutes), and Schedules (start times and frequency: even days, odd days, every X days, or specific weekdays).
Sensors
If a rain and/or door sensor is installed, configure the rain sensor type (NO/Normally Opened or NC/Normally Closed) and door sensor behavior ("Close after" X minutes, or "Close at" a specific time) under Settings → Sensors.
Weather
With the controller in "Internet" mode and registered online (free registration), BlueSpray can skip scheduled runs based on NOAA forecast data — configurable thresholds for chance of rain, forecast look-ahead window, minimum temperature, and maximum wind speed.
System & Administration
Configure the controller name, Stand Alone vs. Internet operating mode, WiFi network/encryption/key, time zone, and NTP servers under Settings → System. Firmware updates are downloaded from bluespray.net/support.html and uploaded via Settings → Administration (~2 minutes; do not unplug power during the update).
Status Indicators
| LED | Meaning |
|---|---|
| Green | Power status — should always be lit when powered. |
| Blue | Data status — blinks when communicating with another WiFi device. |
| Amber (solid) | Controller is booting. |
| Amber (blinking) | Time not synced — reconnect via browser (Stand Alone) or check router internet connection (Internet mode). |
| Amber (off) | Operating normally. |
The reset switch: Up = NORMAL mode. Down for 30+ seconds = SERVICE mode (temporarily resets to Stand Alone/"bluespray" open network for technician access — manual valve runs only, no setting changes possible). Down then Up again within 30 seconds = full reset to DEFAULT network settings (useful if WiFi credentials were entered incorrectly).
Troubleshooting
| Symptom | Remedy |
|---|---|
| Can't find "bluespray" network | Check the green power LED is on; if all 3 LEDs are stuck on, contact support. |
| Zone doesn't water | Check wiring for looseness; if using a master valve, confirm it's set to "Yes" under Settings→Operations; confirm controller status is "On" (not Standby/Delay). |
| Can't find controller in Internet mode | Check WiFi signal strength (add a range extender if weak); verify the WiFi passphrase, or reset to DEFAULT mode and reconfigure. |
| Can't access controller from the internet | Verify port forwarding is set up correctly; if the public IP changes often, lower the heartbeat interval. |
| Doesn't water as scheduled | Review Program, Schedule, and Season settings; use Calendar view to verify the expected watering times. |
Warranty
Avidz LLC warrants BlueSpray products free from defects in material or workmanship for 1 year from the installation date, limited to repair or replacement at Avidz LLC's option. Excludes damage from failure to follow directions, improper/unsafe installation, modification, negligence, or accident.