
Autoslide AutoSwing Automatic Door Operator — Installation Manual
Installation manual for the Autoslide AutoSwing Automatic Door Operator — a motorized swing-door opener with touchless control and smart lock integration.
Full text manual (for reference)
Installation manual for the Autoslide AutoSwing Automatic Door Operator — a slimline, motorized swing-door opener that fits doors up to 220.5 lb (100 kg), with touchless control, smart lock integration, and remote access control via app.
Key Features
- Compact, slim design — only 2.25" (60mm) tall, fits on a transom header
- Heavy-duty 24V motor with pull-arm and push-arm configurations
- Touchless control sensor and motion sensor activation
- Integrates with Yale and August smart locks — grant or deny access from the app
- Grant or limit access to family, friends, and service personnel remotely
- Pet access mode; touchless privacy lock for bathroom doors
- Endcaps with LED indicator lights showing mode settings
- Integrates with electric latching and mag locks
- Clip on/off replaceable lithium battery for backup power
- Powder-coated door guide cover to blend with existing door texture
Technical Specifications
| Operator type | Hinged Door, Swing Door |
| Door opening width | 47" (1200mm) |
| Door weight | Up to 198.4 lb (90 kg) |
| Power input | 100-240VAC 50/60Hz (+/-10%) |
| Auxiliary voltage | 24VDC @ 220mA |
| Relay output | SPDT, up to 2A 24VDC (for electric strikes/locks) |
| Opening speed | 30°/sec opening, 15°/sec slow opening |
| Closing speed | 8°/sec |
| Hold open time | 0-23 sec |
| Ambient temperature | 14°F to 140°F (-10°C to 60°C) |
| Drive weight | 7 lb (3 kg) |
| Electro-mechanical lock integration | Mag Lock, Electric Strike, Electric Dead Bolt |
| Power supply adapter output | 25VDC, 2.6A, 65W |
| Safety protocol | Auto-Reverse, Safety Beams |
| Communication protocols | RF, Bluetooth, RS485, Dry Contacts |
| Battery backup | 21.6V / 3200mAh Lithium |
| Compliance | UL/FCC |
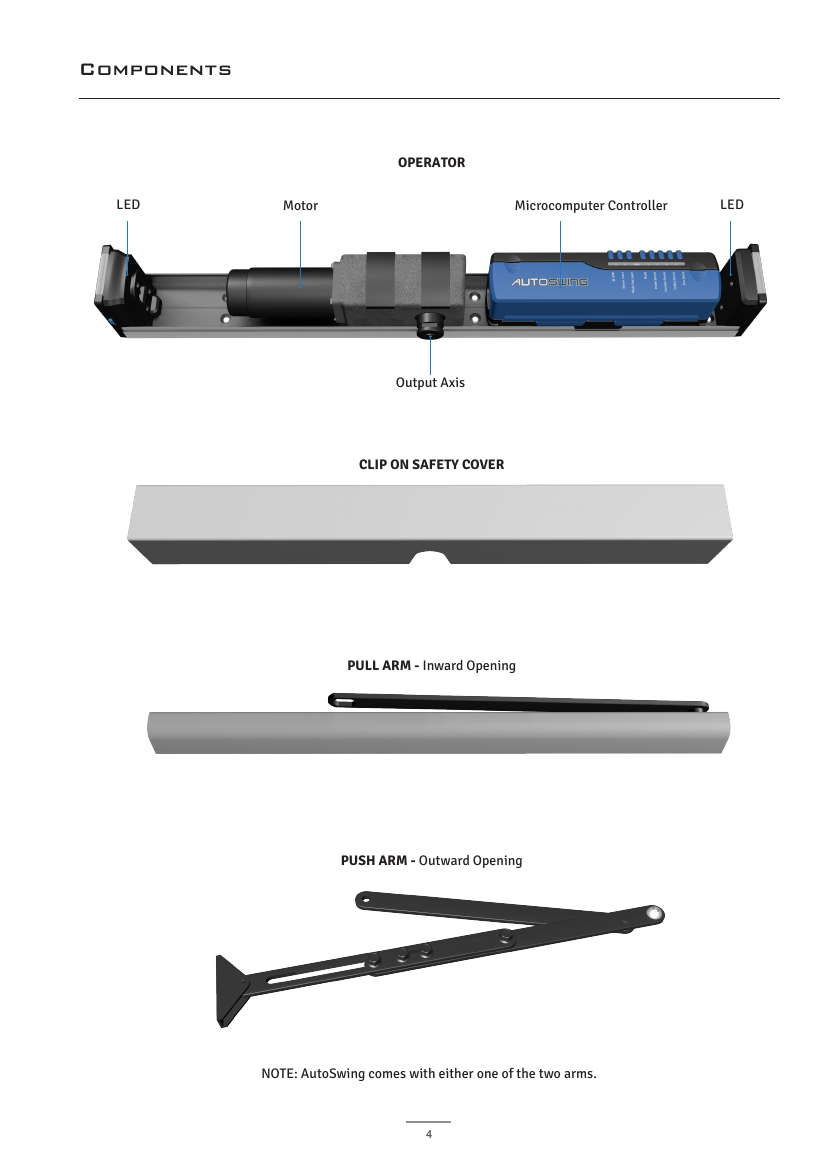
Components
Installation Overview
Full illustrated steps are in the downloadable PDF. High-level sequence:
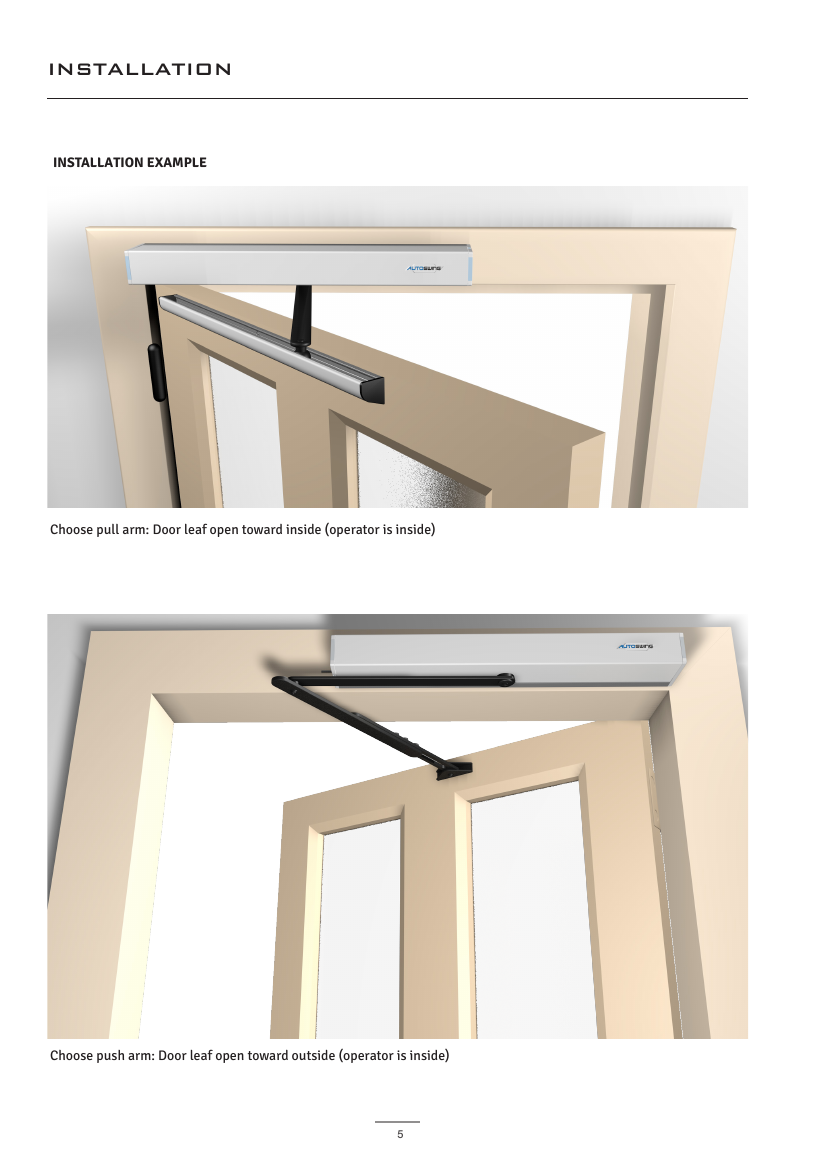
- Choose the correct arm: pull arm for doors that open inward (operator inside), push arm for doors that open outward (operator inside)
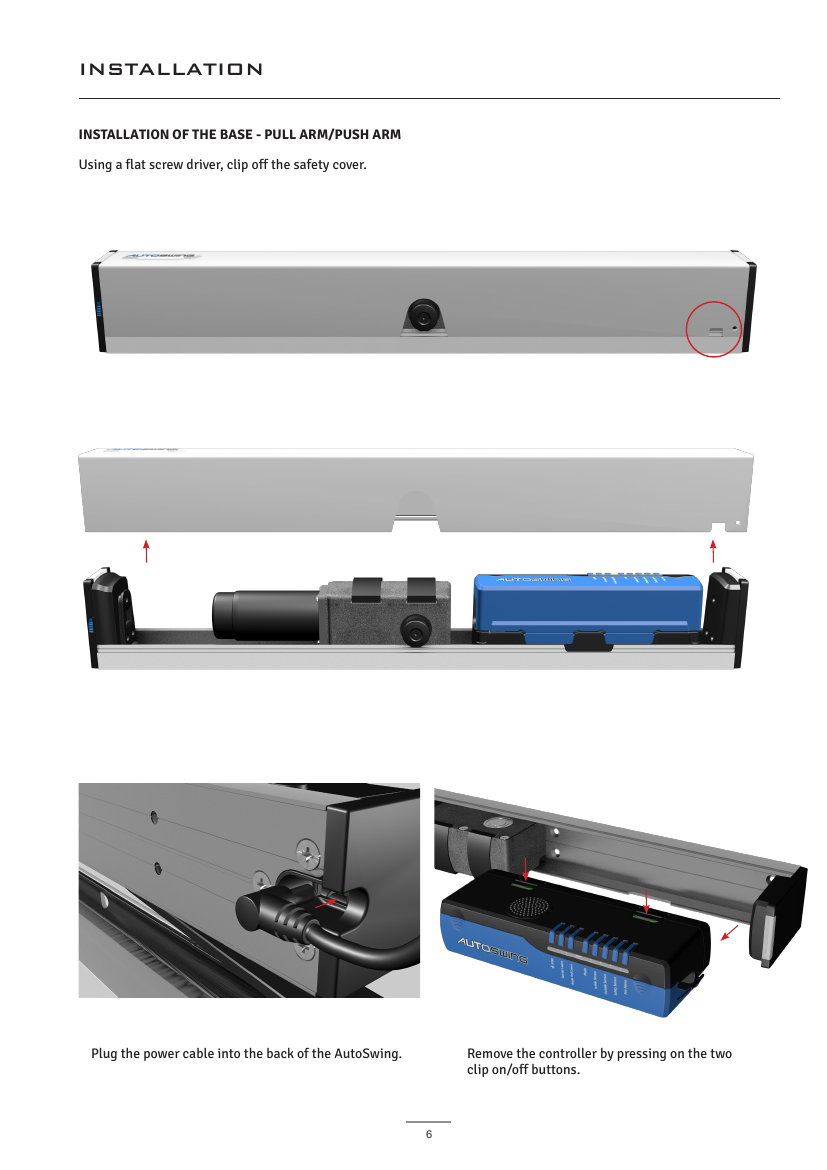
- Clip off the safety cover, plug in the power cable, and remove the controller
- Fix the base to the door frame with wood or steel screws, aligned and leveled to the door edge
- Mount the rail/arm assembly according to your hinge orientation
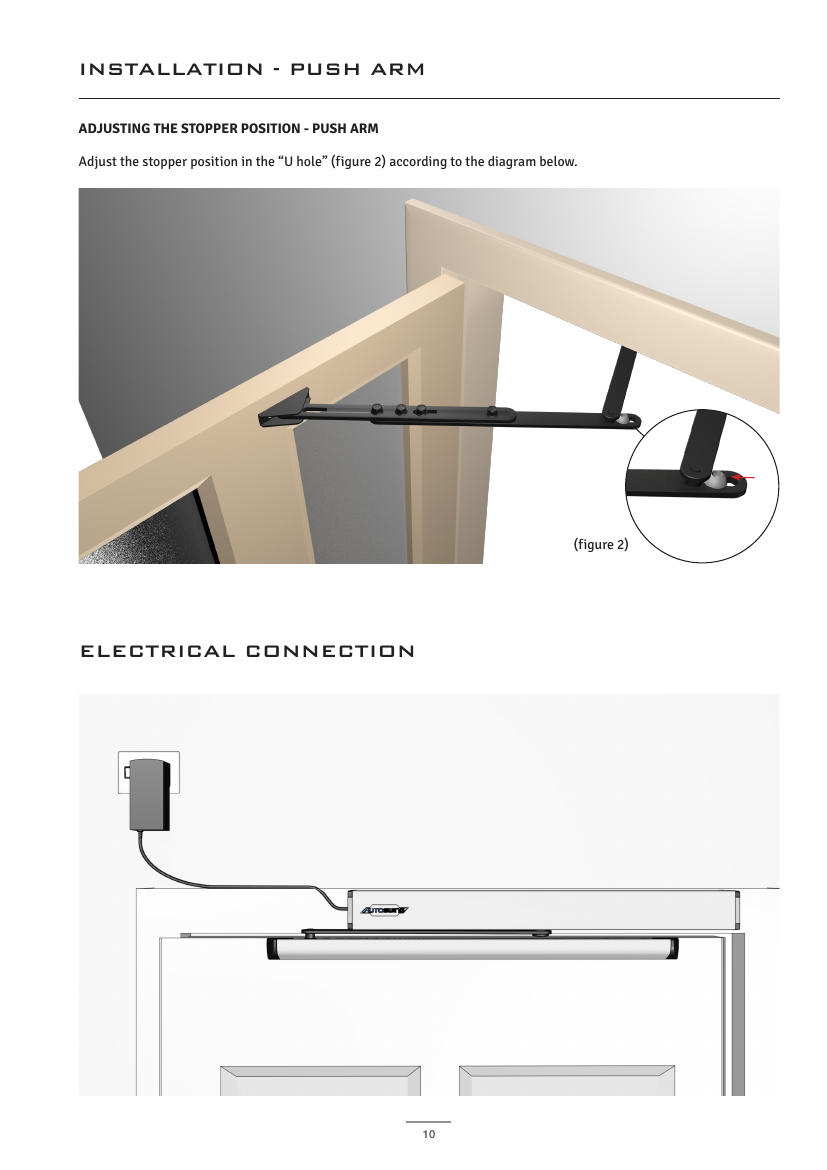
- For push-arm installs: fix the support holder, adjust the arm length for a 90° angle to the door, and set the stopper position
- Complete electrical connections, then power on and configure DIP switches and mode
Operating the AutoSwing
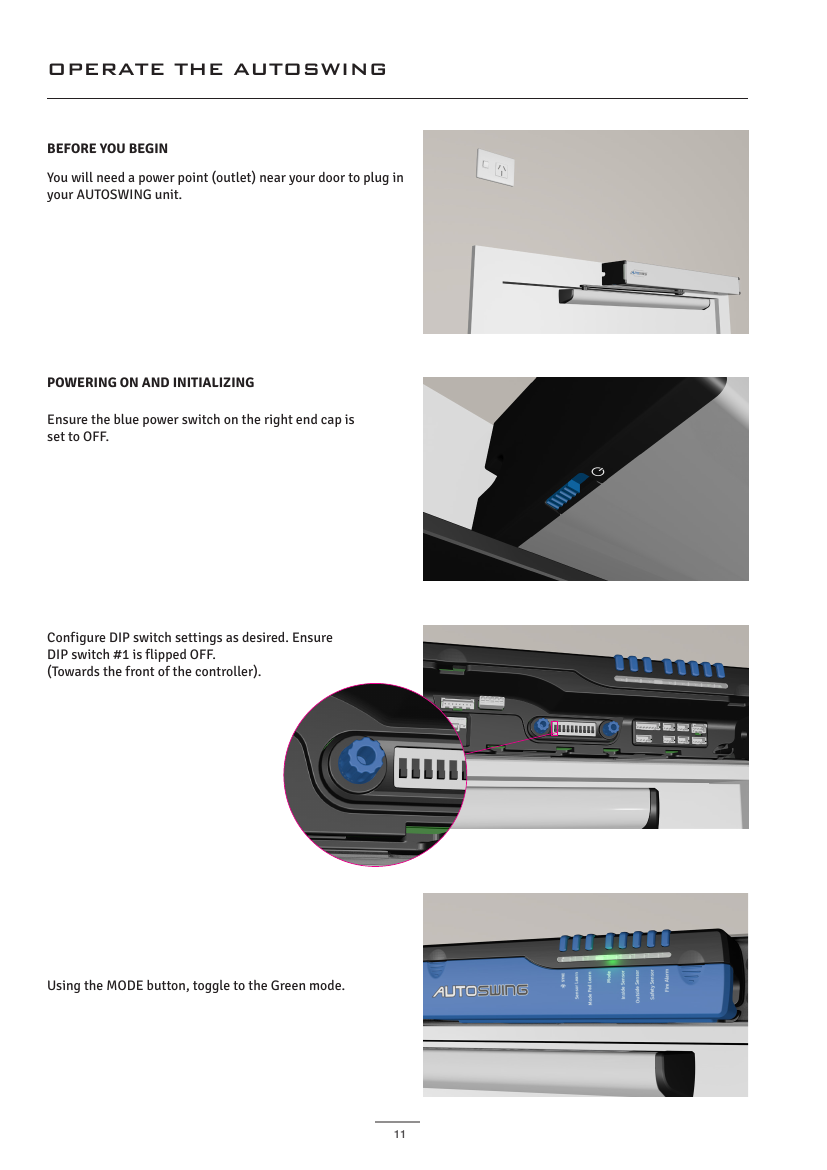
- Ensure the blue power switch on the right end cap is OFF, then configure DIP switches as desired (DIP #1 flipped OFF/toward the front)
- Use the MODE button to toggle to Green mode
- Turn DIP #1 ON — a blue light will flash
- Press the Learn button — the door will swing open until it hits a jamb/doorstop, then close
- A solid green mode light means the door is now set
- Use the MODE button to toggle between Auto, Lock, Hold Open, and Pet Mode settings
FCC Compliance
This device complies with Part 15 of the FCC Rules. It has been tested and found to comply with Class B digital device limits, providing reasonable protection against harmful interference in a residential installation. If interference occurs, try reorienting the antenna, increasing separation between devices, or connecting to a different outlet circuit. For more information, visit autoslide.com.