
Ring Video Doorbell Pro — Quick Start Install Guide
Quick start installation guide for the Ring Video Doorbell Pro.
Full text manual (for reference)
Quick reference guide for the Ring Video Doorbell Pro (BT88LP000CH000) hardwired video doorbell. This guide is highly illustrated; the diagram below and the full downloadable PDF cover step-by-step installation. This page summarizes the box contents, install overview, wiring requirements, and support info.
Getting Started
The Ring app walks you through setup and installation. It's available for iOS, Android, Mac Desktop, and Windows 10 — search "Ring" in your app store or visit ring.com/app. An online guide with videos and tutorials is available at ring.com/setup.
Doorbell Layout
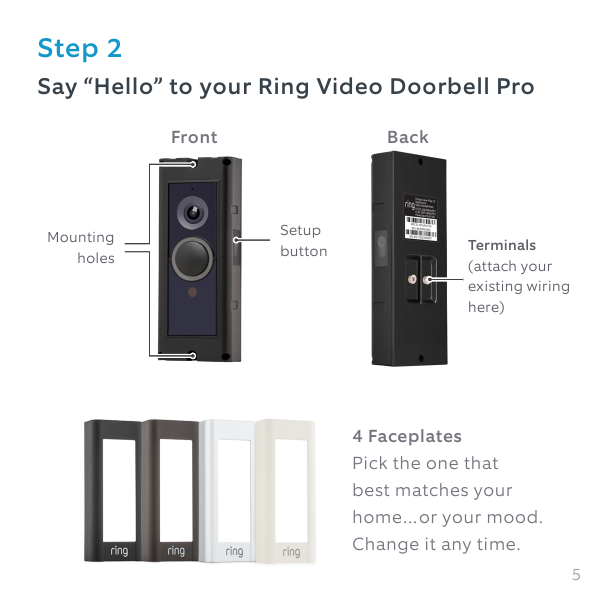
Box Contents
- 1 Screwdriver — Phillips end for mounting screws, star-shaped end for the security screw
- 3 Anchors — for installing on concrete, stucco, or brick
- 1 Drill bit — for drilling anchor holes (if needed)
- 3 Mounting screws — use two to mount the doorbell
- 2 Security screws — use one to secure the faceplate
- 2 Extra wires — to attach your existing wires to the Ring
- 2 Wire connectors — to connect the extra wires to your existing wiring
- 1 Pro Power Kit — install after the doorbell itself; see the separate Pro Power Kit manual
Installation Overview
- Remove your existing doorbell. Shut off power at the breaker first, then remove the old doorbell and disconnect its wires.
- Install anchors (optional). On stucco, brick, or concrete, drill two holes with the provided bit and install the anchors. Skip this step on wood or siding.
- Remove the faceplate on the Ring Doorbell Pro to access the mounting holes.
- Connect the Ring Doorbell to your existing wires. Polarity doesn't matter — either wire can connect to either screw. Feed the wiring into the wall and screw in the doorbell. Requires 16–24 VAC.
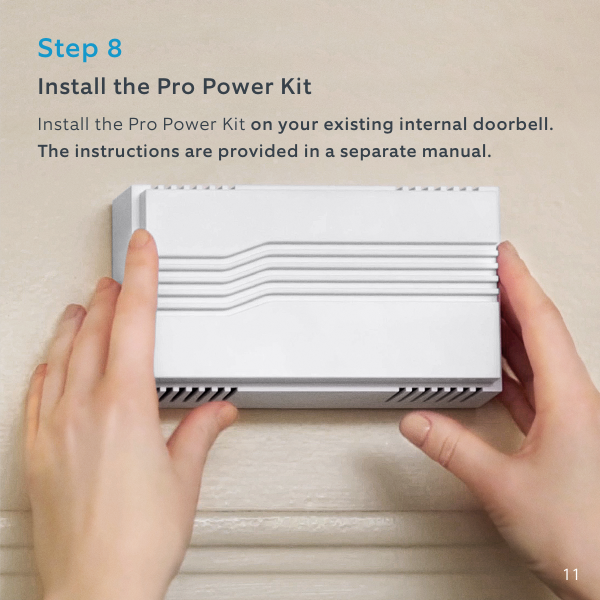
- Install the Pro Power Kit on your existing internal doorbell chime (separate instructions provided with the kit).
Installing the Pro Power Kit
Safety & Environmental Notes
- Protect the device from direct sunlight.
- Install in dry locations; protect from rain and humidity — no contact with salt water or other conductive liquids.
- The device must be charged only within a building, in a dry state.
- Caution: Risk of explosion if the battery is replaced with an incorrect type.
- Dispose of used batteries according to local battery disposal regulations.
Manufactured by Bot Home Automation, Inc., 1523 26th St., Santa Monica, CA 90404. Declares compliance with Directive 1999/5/EC — declaration of conformity available at ring.com/DoC.pdf.
Customer Support
Online help center: ring.com/help (available 24/7; Ring Community Support 7 days a week)
- Domestic: 1-800-656-1918
- International: +1 310-929-7085
- Email: help@ring.com