
Leviton EPCM1/2/3-OF3 — Dual Mount Pedestal with Automatic Cable Management Installation Manual
Installation manual for the Leviton Evr-Green Dual Mount Pedestal with Automatic Cable Management.
Full text manual (for reference)
Installation manual for the Leviton Evr-Green Dual Mount Pedestal with Automatic Cable Management (Cat. Nos. EPCM1-OF3, EPCM2-OF3, EPCM3-OF3), for use with Cat. Nos. EV320, EV32W, EV48W, and EV48S EV charging stations. This manual is highly illustrated; the diagrams below and the full downloadable PDF cover step-by-step installation.
Safety Warnings
- Electrical hazard: installation, commissioning, and maintenance of the charging station must only be performed by trained, qualified, and authorized personnel knowledgeable of and responsible for compliance with existing standards and installation regulations.
- If the specifications for the location are not followed, this can result in death, injury, or equipment damage.
- The pedestal must always be fitted with two charging stations.
Kit Contents
EPCM1-OF3 (Pedestal Body): 1x Pedestal Body, 4x M8 100mm expansion screws, 14x M6 20mm screws with spring/flat washers, 16x M8 16mm screws with flat/spring washers, 2x M40 cable glands, 10x M5 22mm screws, 1x junction of pedestal, 2x connector base, 1x screwdriver.
EPCM2-OF3: Mounting Template (1).
EPCM3-OF3: Retractable Cord Management System (1).
Installation Overview
Full illustrated steps with photos for every stage are in the downloadable PDF. High-level sequence:
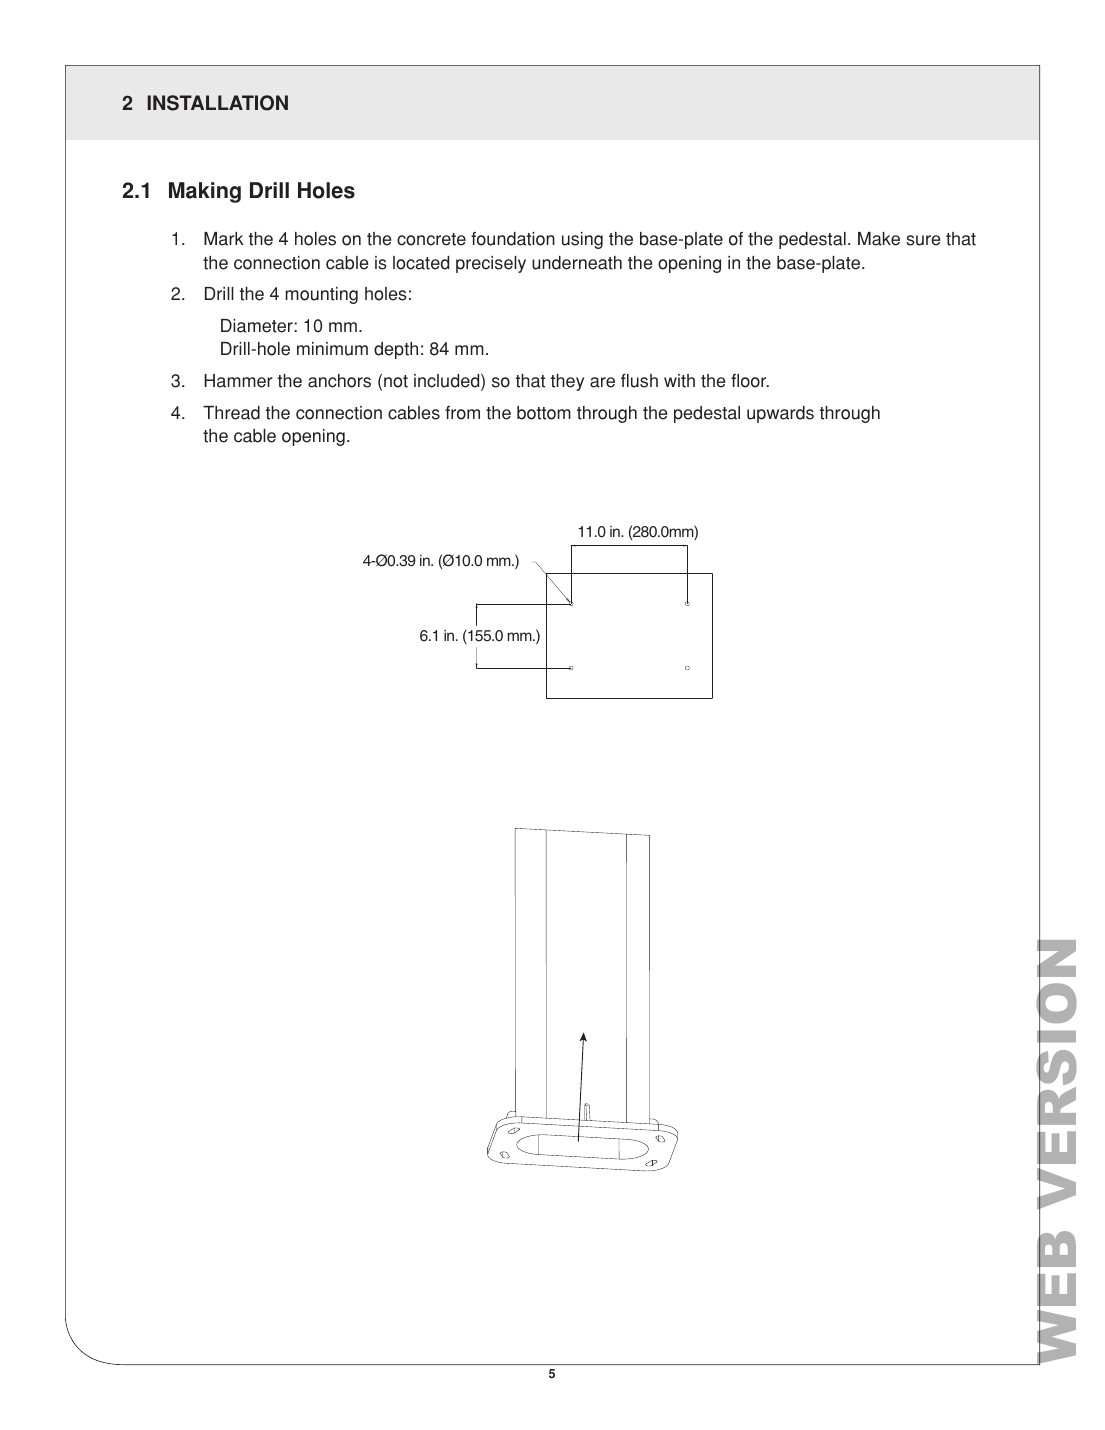
- Mark and drill 4 mounting holes (10mm diameter, 84mm min. depth) on the concrete foundation, aligned with the base-plate; thread connection cables up through the pedestal.
- Anchor the pedestal's lower part to the foundation using 4 sets of M8 100mm expansion screws; remove the 4 M6 20mm screws of the wiring window.
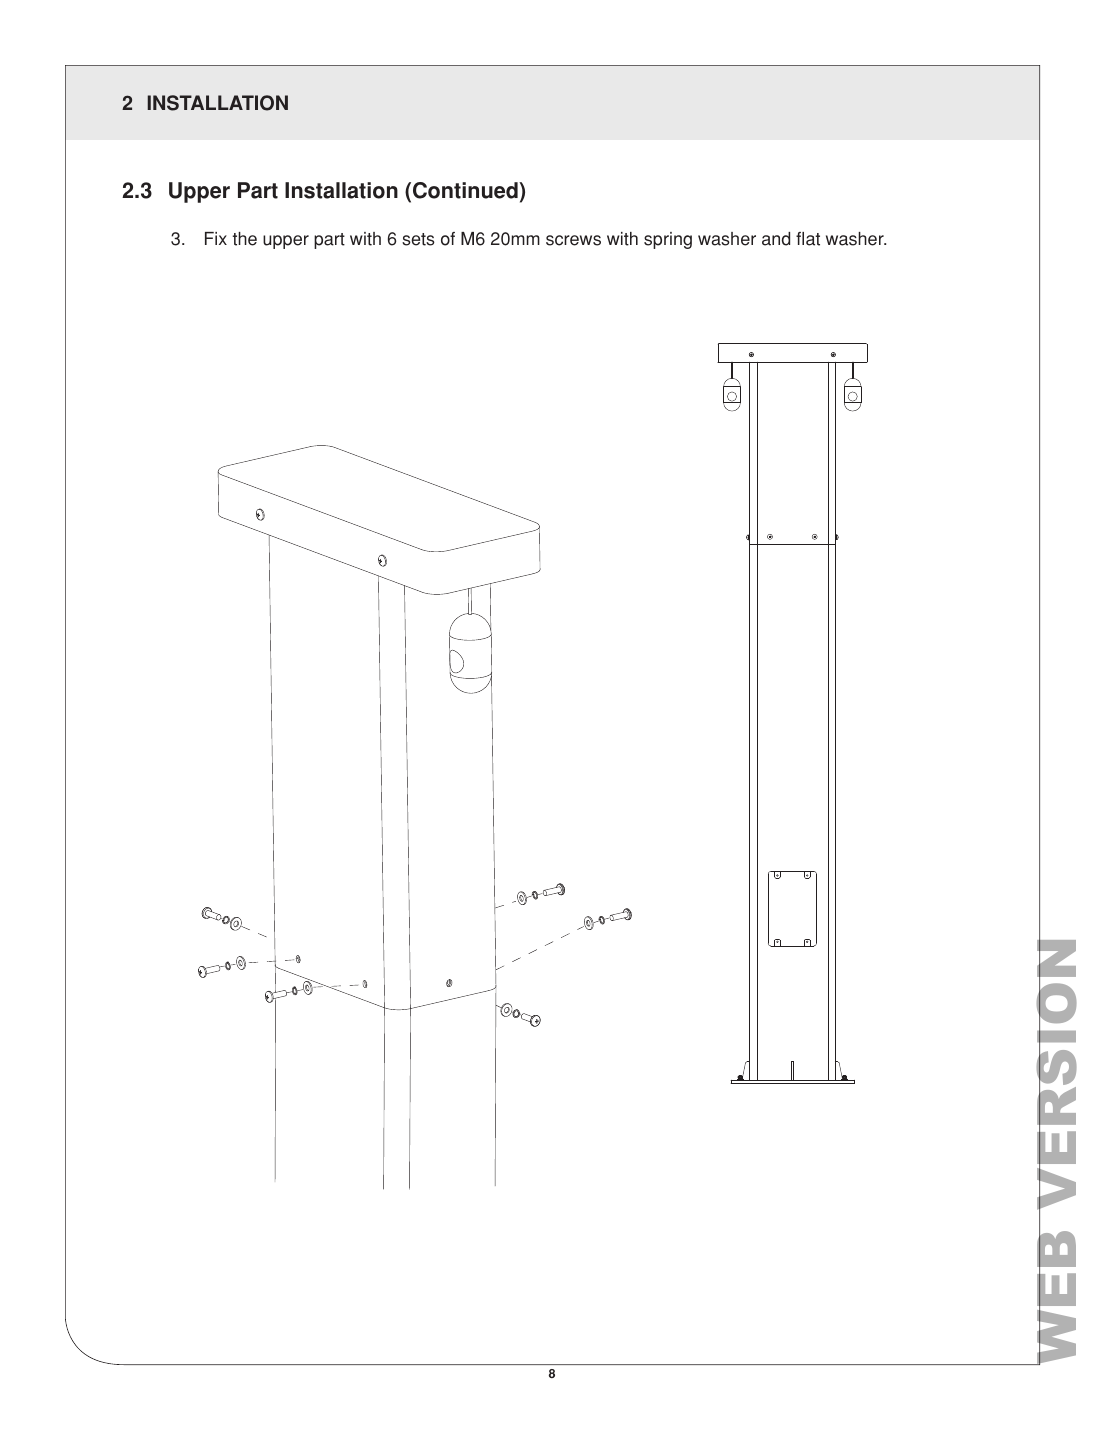
- Install the upper part: connect the junction with 6 sets of M6x20mm screws, cap with the cable management structure, then fix with 6 more M6 20mm screws.
- Insert 2 cable glands into the pedestal and fix with M8x16mm screws.
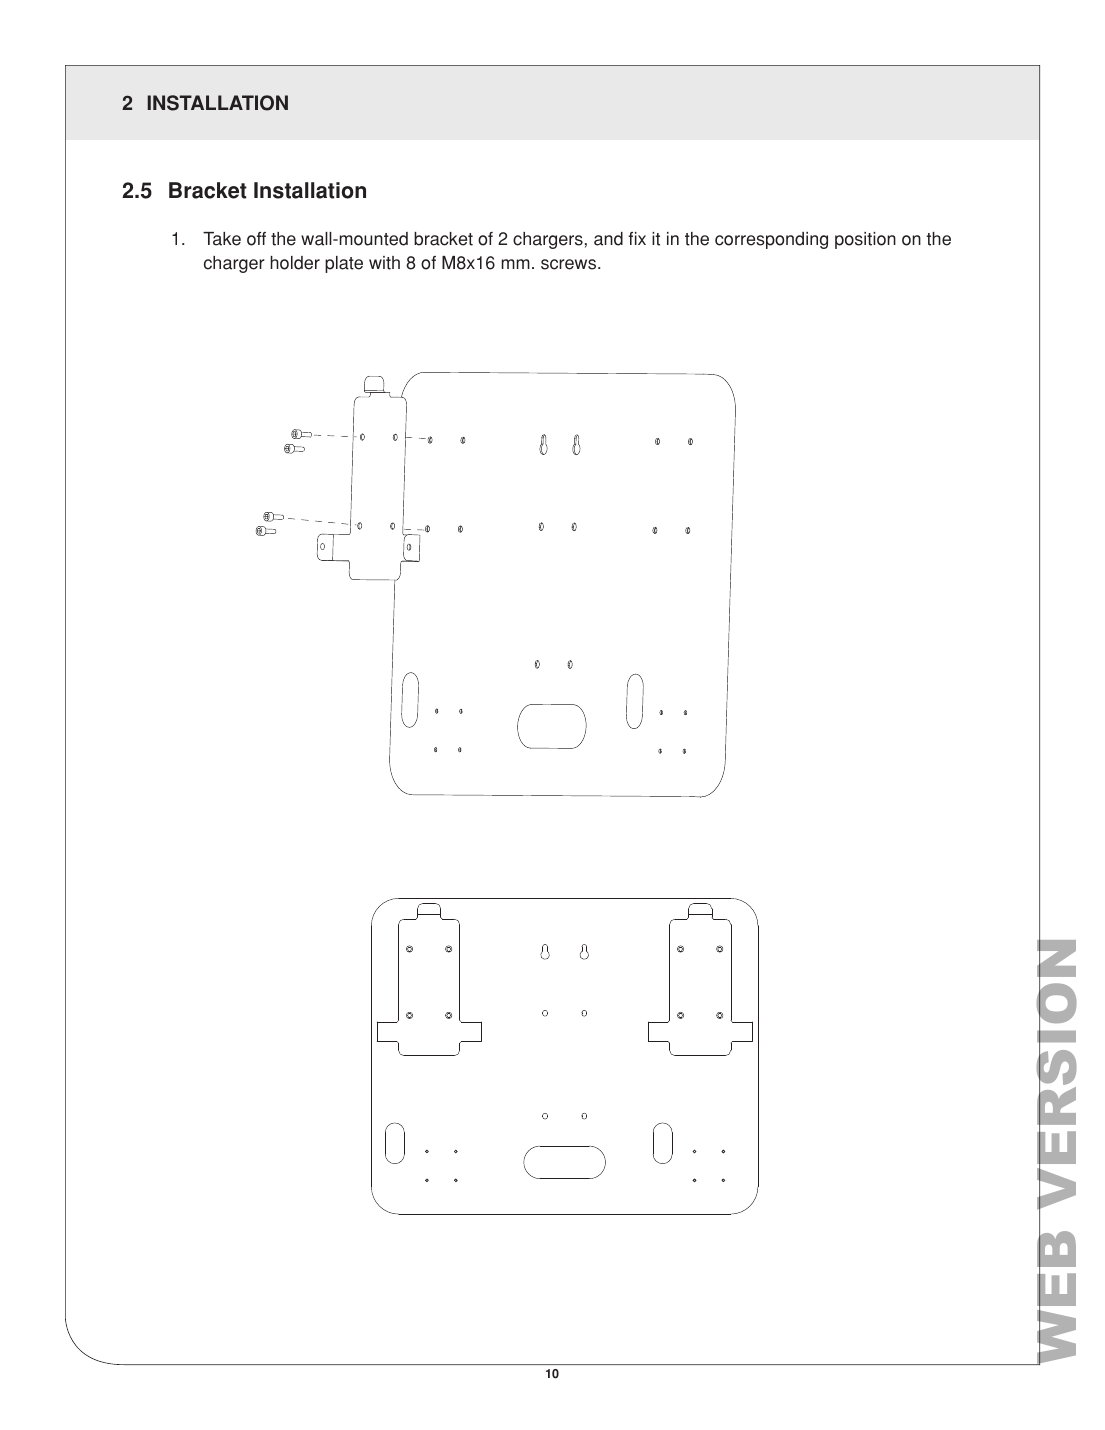
- Install the wall-mounted charger brackets onto the charger holder plate using 8x M8x16mm screws.
- Install the 2 connector bases onto the charger holder plate using 8x M5x22mm screws.
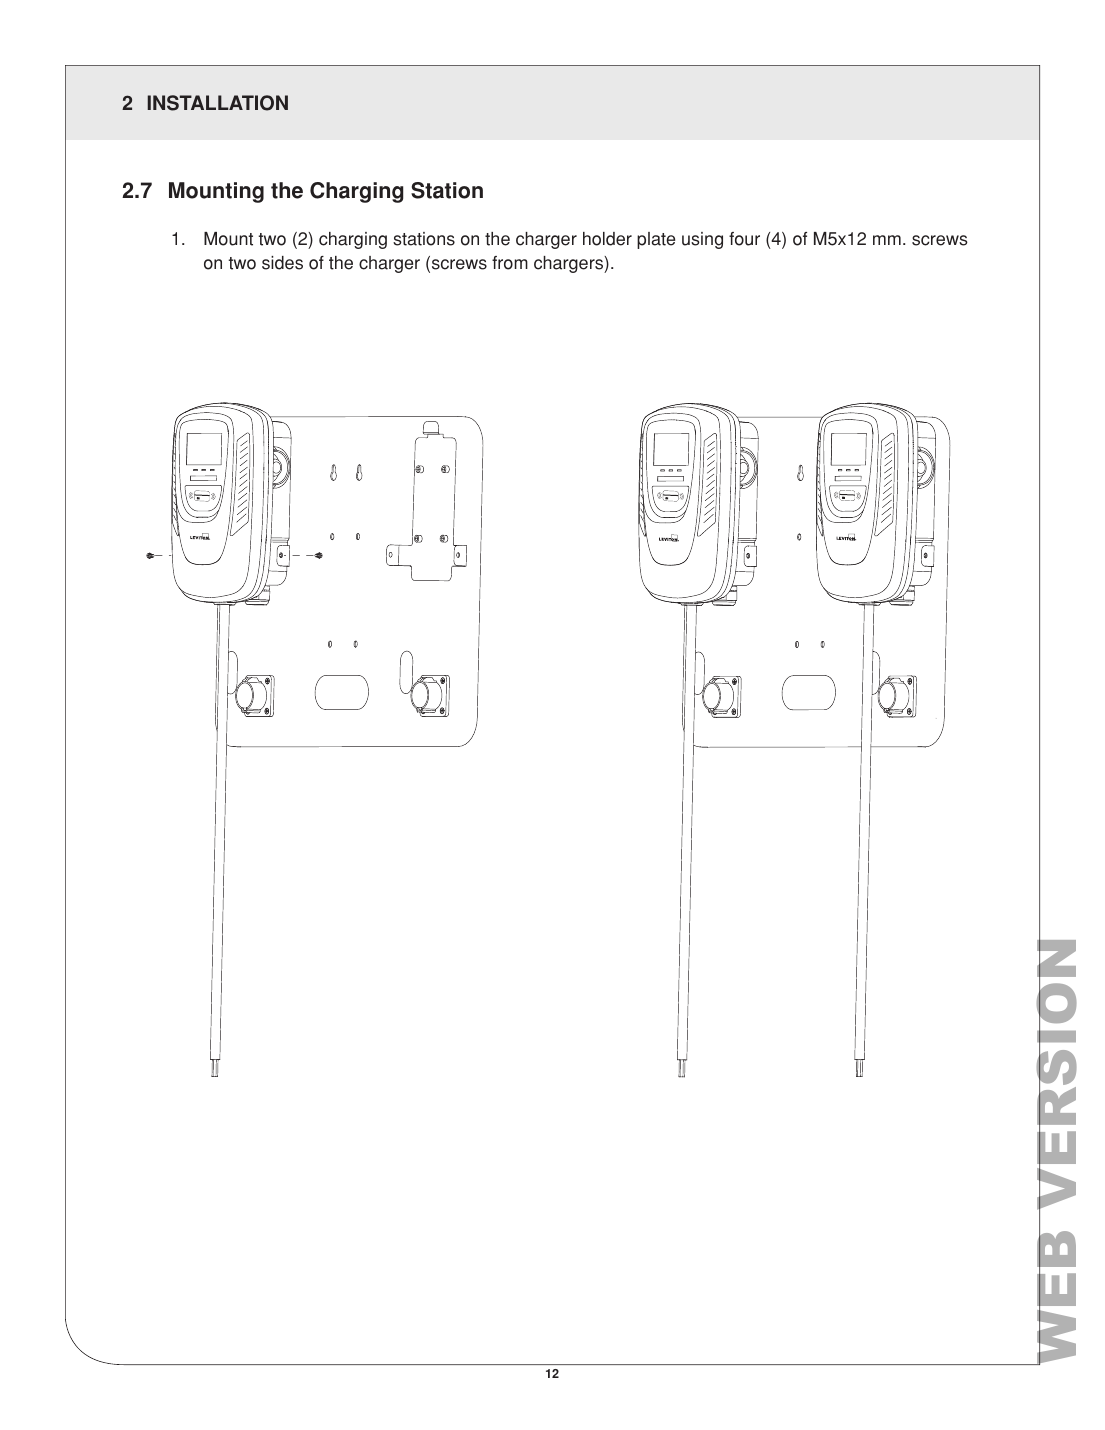
- Mount the two charging stations onto the charger holder plate using 4x M5x12mm screws (from the chargers) on each side.
- Hook the charger holder plate onto the screws and fix with 4x M8x16mm screws with spring/flat washers.
- Thread connection cables through the cable gland, perform electrical connection and commissioning per instructions, and fix the 4 M6x20mm screws of the wiring window.
- Position the cable clamp so the charging cable hangs about 5cm (2 in.) above the ground when fully retracted; torque the clamp bolt to 13.3 in-lbs.
Installation Reference Diagrams
Positioning the Cable Clamp
Pull the cable management system's cord to hold the cable clamp. Remove the two screws, determine the clamp position — the cable between the clamp and charging connector must not touch the ground when fully retracted; it should hang about 5cm (2 in.) above the ground. Set the clamp over the band, reinsert the bolt and washer (M5 28mm), and torque to 13.3 in-lbs. Let the cable retract itself and verify ground clearance before returning the plug to the connector base.
Compliance
FCC Part 15 and ISED License-exempt RSS standard(s) compliant. Class A digital apparatus per Canadian CAN ICES-3(A)/NMB-3(A).
Warranty
Limited 2 Year Warranty and Exclusions. Void if installed improperly, in an improper environment, overloaded, misused, opened, abused, or altered. For details visit leviton.com or call 1-800-824-3005.
Manufacturer: Leviton Manufacturing Co., Inc., 201 North Service Road, Melville, NY 11747 · 1-800-824-3005 · leviton.com